Once upon a time, way, way, way back when, black and white photography was the only type of photography. Even though we’ve been able to create color photographs for more than 150 years now, black and white photography remains an elegant, if not nostalgic form of photography that allows you, the photographer, to tell your story in a way that a color photograph cannot.
Here are five tips that you can start using immediately to create better black and photos.
1. Use contrast, shape, and texture
When you shoot in color, complementary and opposing colors help bring your photo to life. But when you convert that photo to black and white, those colors are changed to shades of grey. This means that your image needs a lot of contrast to make it compelling.
Look for scenes that have a combination of bright and dark areas as well as texture. In this photo—taken in Yosemite National Park—the clouds, sky, and rock provide the perfect combo of contrast, shape, and texture to make it stand out as a black and white image.

2. Increase the exposure time
Long-exposure photography is a technique that can set you up to create dramatic black and white images. This works really well if you’re photographing subjects like moving clouds or water against non-moving objects like buildings, or natural objects like rocks.
The sky, clouds, and water will typically give you a brighter exposure, which helps achieve the element of contrast noted above. The blurred movement of the water and the clouds can add interesting texture to your image as well.
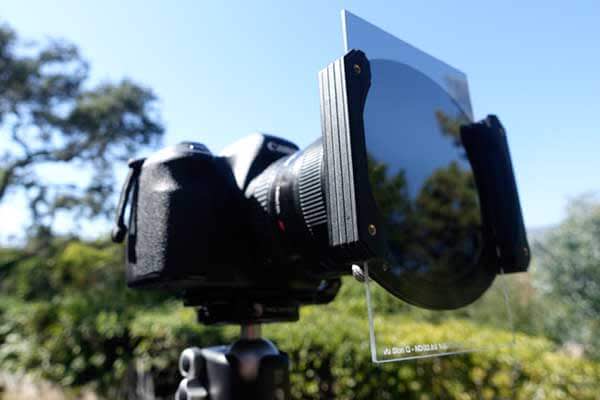
To achieve this look, you’ll need a strong ND (neutral density) filter such as a Lee Big Stopper or a Vü Filter to capture the movement without completely overexposing your photo.
Keep in mind that you’ll need to recalculate your exposure time when you put one of these filters over your lens. This is because your camera won’t be able to “see” through the filter and calculate the exposure time on its own. There are a number of apps for iOS and Android devices that will help you do this.

3. Use a graduated ND filter
Whereas solid ND filters are a good choice for creating long-exposure photos like the one shown above, graduated ND filters and polarizing filters help you control contrast and exposure in specific parts of your photo.
For example, a graduated ND filter is great if you want to increase the exposure of the foreground in your photo without overexposing the sky and clouds. Maintaining a proper exposure for the sky and clouds allows you to keep the detail and texture there, which will help you create a better image overall.

4. Manipulate contrast, exposure, levels, and curves
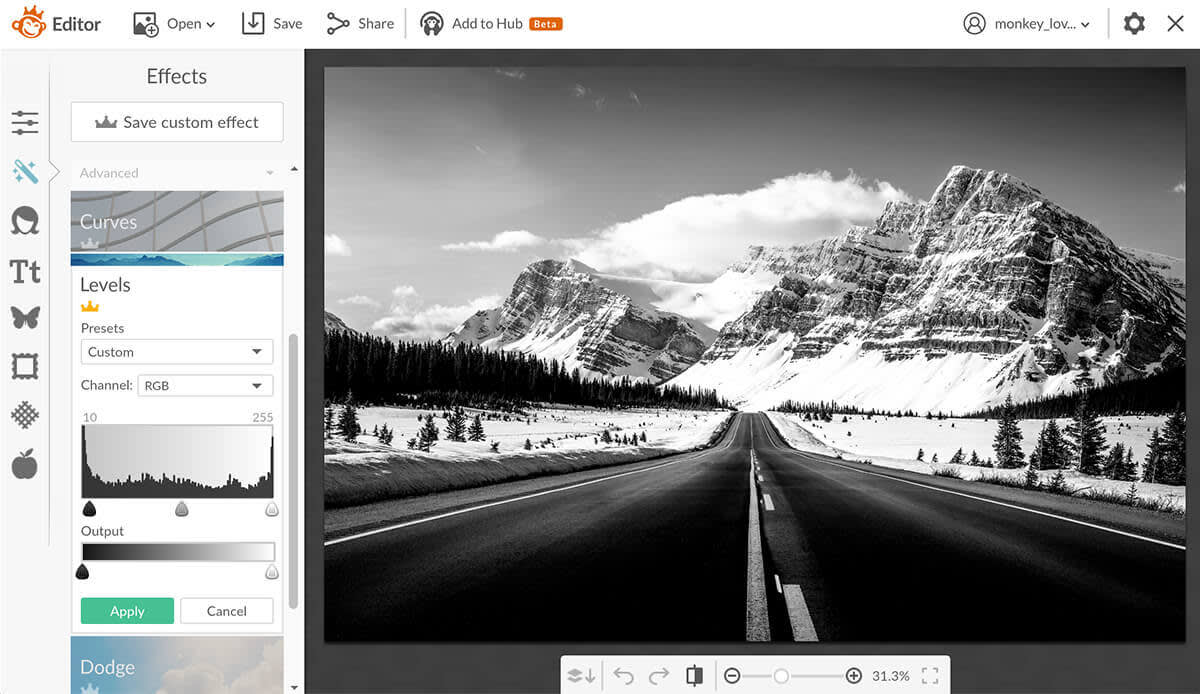
No matter how much time and effort you put into taking the shot itself, you’ll likely need to do some editing after the fact. You’ll find some great options for adjusting brightness and contrast in the Editor. Head to Basic Edits, then Exposure, and adjust the sliders. You’ll also find eight different black and white effects in the Effects tab, which can help you get the look you’re after.
To customize your black and white conversion, go the to the Advanced group in the Effects tab and use Levels or Curves to fine-tune the tonal range and contrast of your image.


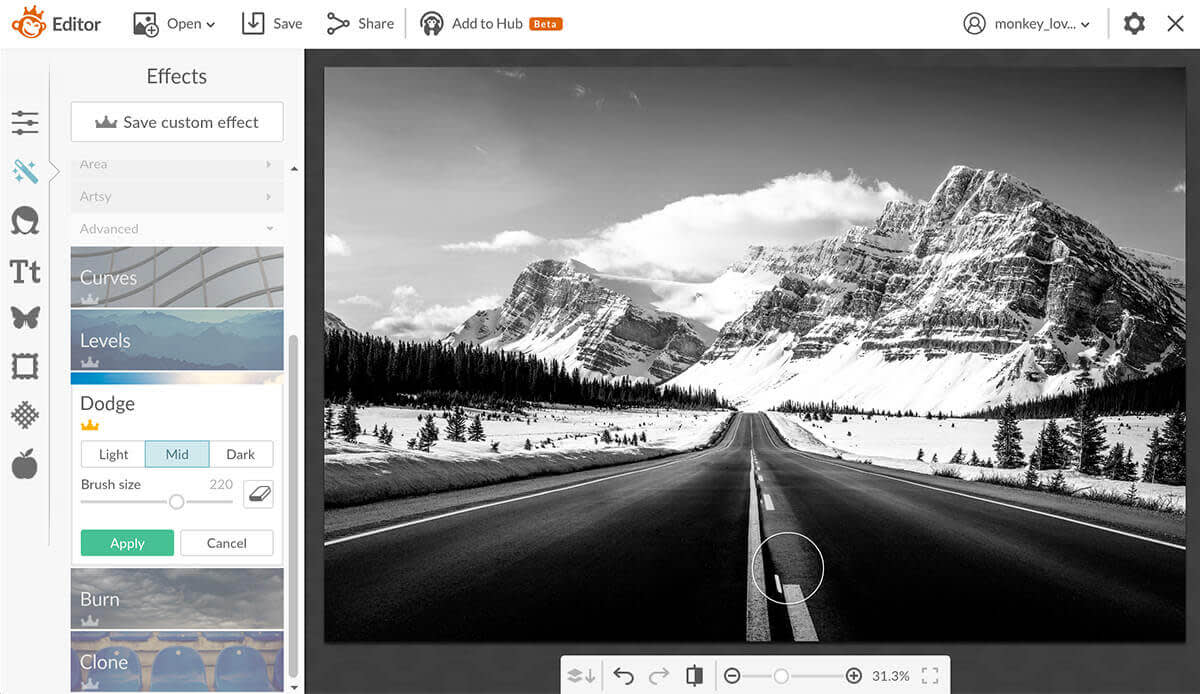
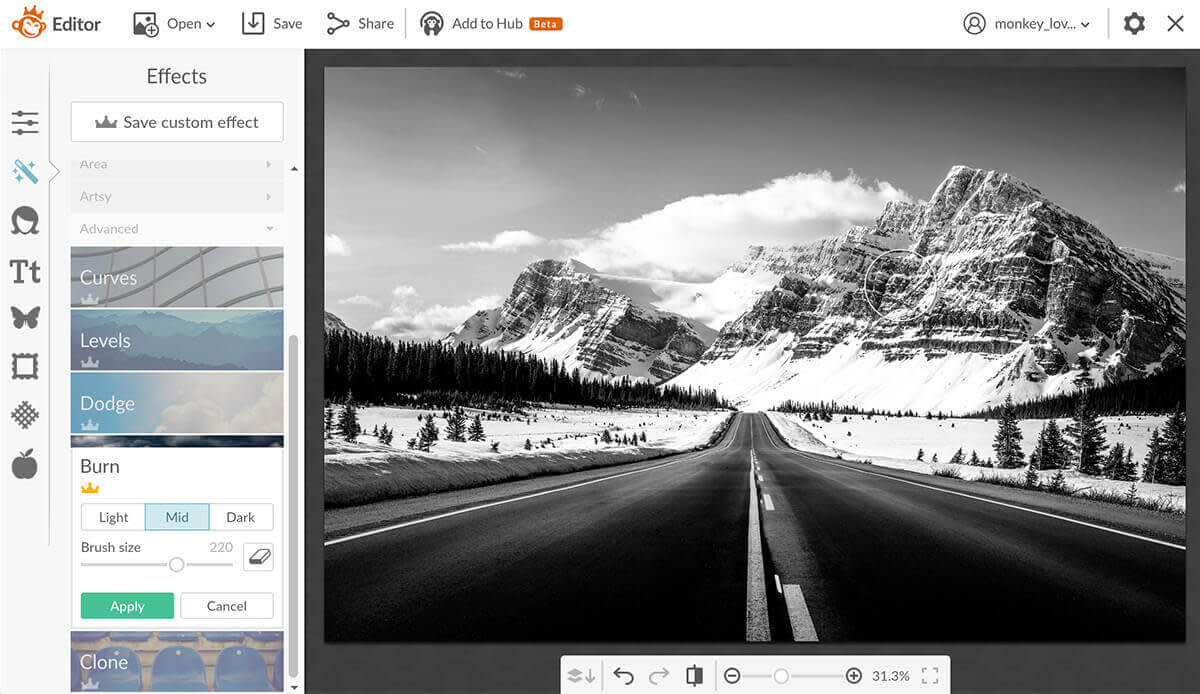
5. Feel the Dodge and Burn
Dodging and burning is a technique used in a traditional darkroom to make highlights darker (burning them) and shadows or dark areas lighter (dodging them). These are great tools to use if you want to brighten or darken a specific area of your image, as opposed to making a big change to the entire thing.
Keep in mind, you don’t have to try all of these tips on every single one of your black and white photos—depending on the shot, only one of them may be useful. However, by exploring and practicing each one, you’ll develop a better sense of how they can help you create black and white images that stand out.


