We know that you’ve held your dark passenger at bay. You yearn to transform your photo to show the vampire that lurks within you! But maybe you’re worried that you’ll never return to your regular self. Or maybe it’s just that you could use a few tips. We are here for you, creatures! We are here with tips galore for mastering our vampire effects.
Alter the skin
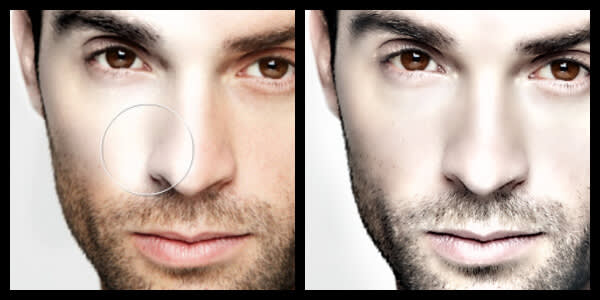
Alabaster Skin
Skin effects like these works best on a subject shot fairly close-up. After applying your skin effect, adjust the Fade slider to choose the right intensity. Use the eraser to remove errant strokes. Select Hungry for extra glow, or Fed for a more chill demeanor.
Dial up the eye color
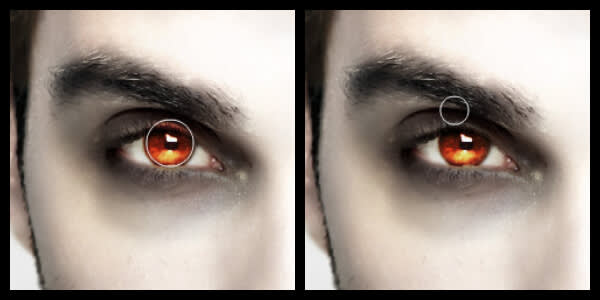
Evil Eye Color
Zoom in on the eyes in your photo. Before you add the soul-withering color, resize the brush to match the iris size in your photo.
Use Eraser to erase dabs of eye color that bled over onto the eyelid. Reduce Eraser hardness to get softer edges. Experiment with the Fade and Contrast sliders to adjust realism and intensity. For an extra pop, use Eye Bright in Touch Up together with this effect.
Compound the pressure
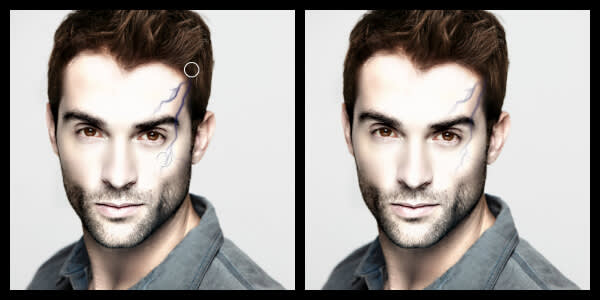
Veins
If you need mondo veinage, move the Branches slider to split off more ends from each root. Experiment with the Thickness and Fade sliders to get realistic, right-sized veins. Eyes can be vein-y, too!
Let the blood flow
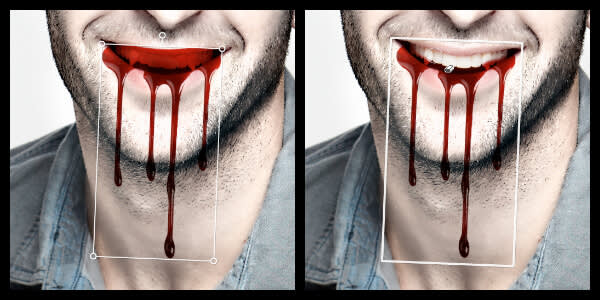
Blood Drops
Vampires could really use a lobster bib, but nobody seems to have one on hand before they get bitten! Give the gore with blood teeming over the bottom lip or drizzling out of the corners of the mouth. Make the blood overlap the teeth a bit and then use the eraser to erase out to the gum line. Choose the smaller blood drops to place around the face and clothes. Use horizontal flip, vertical flip, and erase to randomize the splatters.
Set the scene
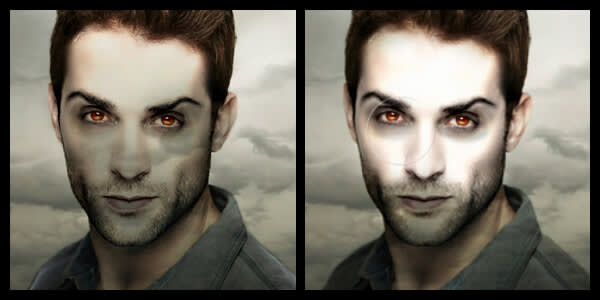
Night Frights
Spookify your background! After applying the texture effect, use the paintbrush to brush the texture off your subject and other objects in the foreground. Then adjust the fade.
You can also apply textures to skin, giving it a crackled or vein-y look. After applying the effect, use the paintbrush to brush the texture off your background. Then adjust the fade.
Amplify the mood
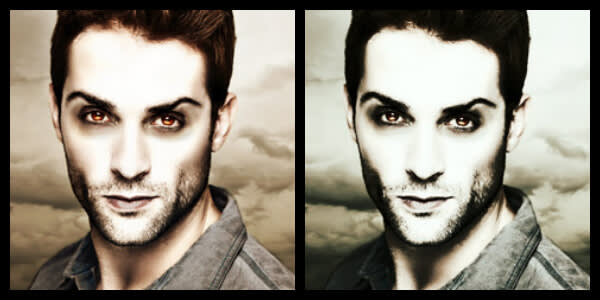
Nosferatu Dawn (left) and Lugosi Burnish (right)
Dig these vivid horror movie poster effects! Be sure to merge any graphics to your background before you apply it; click the merge button on the top toolbar. Try increasing the blacks for a more dramatic look with Nosferatu Dawn. Lugosi Burnish works best with an image that has good contrast between light and dark.
There you have it, Vlads and Vladettes. Now get down with your bad self!
