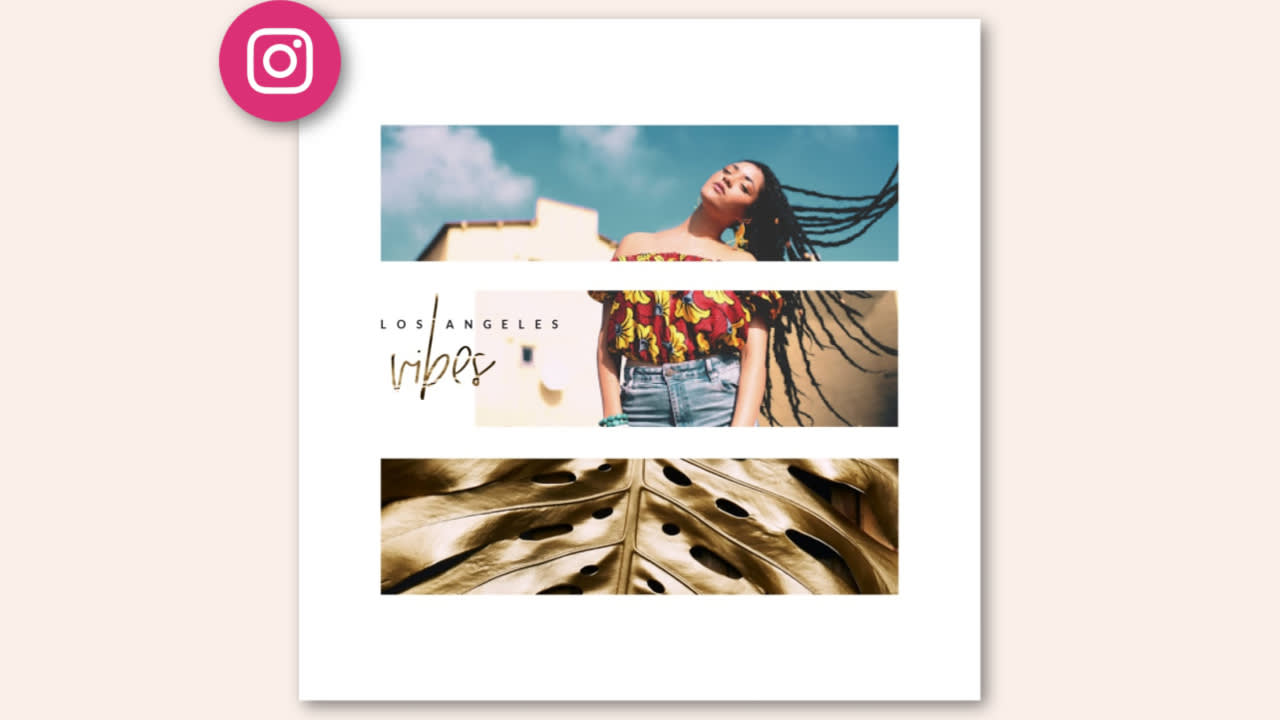
We'll show you how to make this Instagram post in this tutorial
Ever wonder how to put your pics inside text? Or make your photos peek out of a shape? That’s called “masking”—e.g. you’re putting a photo mask on your text or a shape and it’s super-duper easy to do. You can even apply a mask across multiple shapes to get a fractured design vibe. We’ll show you how.
Watch the video and follow along, then reference the steps below to create your own!
Steps to add a mask to text or graphics:
Click the Create new button on the PicMonkey homepage.
Select “Templates” from the drop down menu.
Choose an Instagram Post template or start from a blank.
Add graphics to your canvas from the Graphics tab at the left. Select them.
Go to the Textures tab, then "Add your own texture."
Choose a photo that you'll apply as a texture to your graphic(s).
Adjust your texture within your graphic to your liking.
Click Apply.
To create a text mask, do the exact same steps from 5-8 above after you've added text to your canvas.
Pro tip: Note that you can preview templates on your canvas by clicking the small versions. Once you make a change to the template on the canvas, though, you’ll be prompted to overwrite or save your current file.
To apply a photo mask over multiple shapes or text boxes, just multi-select the layers you want to mask using the Layers palette. Use CMD+click (Mac) or CTRL+click (PC) to select multiple layers.
Pro tip: Wanna learn all the PicMonkey keyboard shortcuts? Check out: PicMonkey Keyboard Shortcuts You Wanna Know for all the handy macros.
Learn more about masking:
Everything You Gotta Know About Clipping Masks in New PicMonkey
Help article: Putting Photos Inside Text (Masking)
