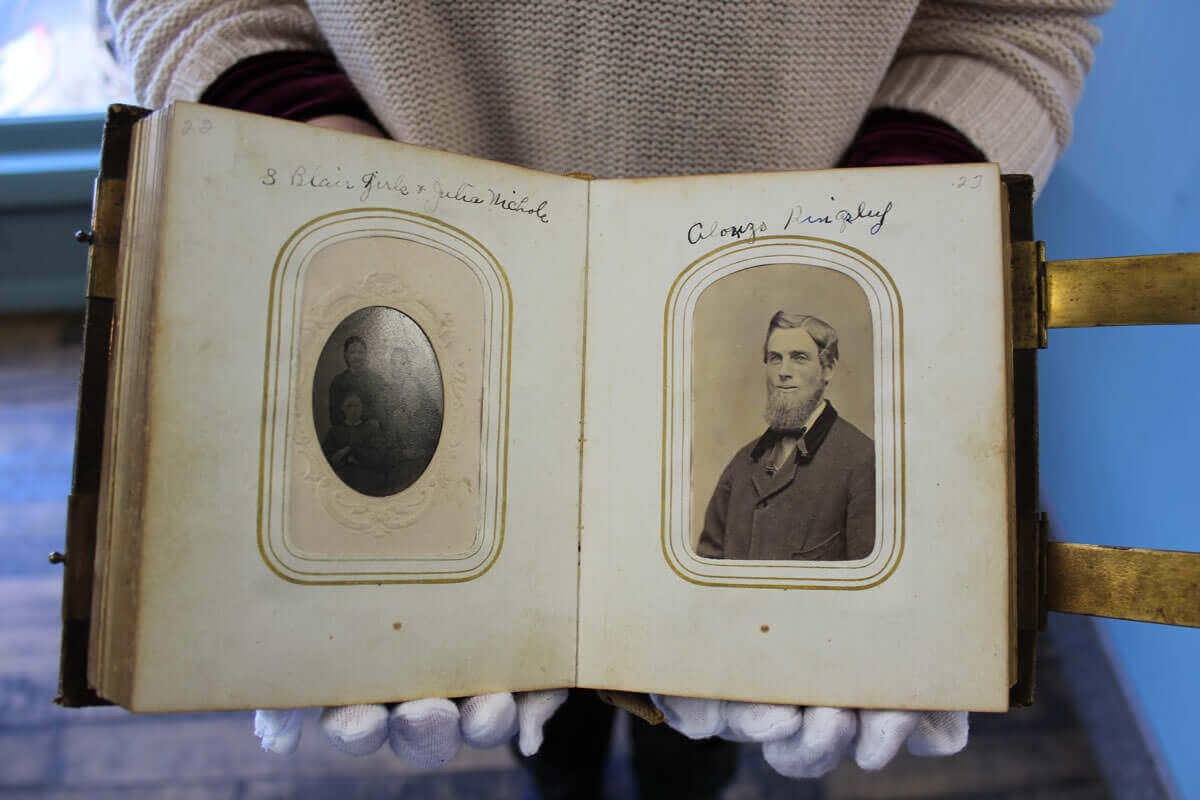
If you have a folder of vintage photo albums and scrapbooks hiding in your attic or basement (or even haphazardly stuck in the corner of a closet), the best thing you can do is move them immediately. Whether you spent your childhood years building them yourself or inherited them from family members, if you’re not ready to digitize your albums, it’s important to preserve them properly! Here are our top preservation and organization tips.
Proper conditions are crucial
There are many measures you can take to keep your albums and scrapbooks from deteriorating, such as humidity control and air circulation systems. But these precautions are more for archival preservation, and there are simpler ways to make sure your photos, albums, and scrapbooks remain as safe as possible. Here’s a list of easy-to-follow dos and don’ts:
Protect them from excessive exposure to light. We don’t just mean bad fluorescent lights, either. Even UV rays from natural light will fade and ruin your photos. If you keep your albums and scrapbooks on shelves, make sure you can close curtains and shades to keep them out of direct sunlight.
Temperature control. Any part of your house that’s too hot or too cold—like the attic in the summer or the basement in the winter—is not a good place for your albums and scrapbooks. Too much temperature fluctuation is also bad, so don’t place these items in your garage (plus the garage tends to be one of the dirtiest parts of the house). The basic rule of thumb is if the temperature is uncomfortable for you, you shouldn’t be storing anything valuable there.
Other hazards. Stay away from radiators, vents, portable heaters, and any area prone to leaks, rodents, or insects.
Handle albums appropriately

Remember how we said you should move your albums and scrapbooks immediately, especially if they�’re not in ideal conditions? We still mean it, but even the best conditions can’t protect against the effects of poor handling. Here’s the lowdown on how to handle your precious keepsakes properly.
Pages
The majority of vintage scrapbooks were made from poor-quality paper and have been deteriorating since they were made. To keep them in the best condition possible:
Look through the album in a clean, dry area away from any food or drinks.
Make sure your hands are clean in order to avoid staining the pages with the oil from your skin, and consider wearing gloves.
Spines
Scrapbooking is still a hugely popular hobby, and modern albums are made to hold a lot more 3D elements and decorative items than older versions. When it comes to the spines on your albums:
Be careful of any spiral binding that is coming undone. It’s sharp!
Never try to force the binding on your scrapbook or album to lay flat.
Check the binding on your older albums and scrapbooks and make sure they are still together before you try picking them up or turning pages. You run the risk of everything dropping right out of your hands if you don’t.
The insides
There is no limit to the amount of cards, tickets, brochures, postcards, and other items that people put into scrapbooks and albums. However, most used bad tape and terrible glue to get the job done. This makes each album unique and valuable, but also remarkably prone to damage. Think about the following things when dealing with your albums’ innards.
If you have photos in magnetic albums, the plastic is unstable and the glue holding everything in is not archival. If they aren’t permanently stuck to the page right now, they will be. The best thing you can do is remove the photos from the album and store them separately.
Any multi-page items are generally fastened to the page by the last sheet, so support the whole album page when turning it. The weight could make brittle pages tear very easily.
You should handle your albums and scrapbooks as little as possible until you’re ready to preserve them digitally. As you’re going through everything and packing it for storage, make notes for yourself about each album so you can properly label your storage containers for future reference. We’ll show you how we make labels, too!
Store your albums the right way
Now that you know what conditions your vintage photo albums and scrapbooks should be homed in and how to handle them, it’s time for the easy part: storage. Here’s a quick look at the best storage options.
Shelves
Put albums that are similar in size and volume together to keep their structure intact. Any oversized albums you keep on a shelf should be laid flat and fully supported by the base of the shelf. If any part of it is hanging over the edge, the covers will warp over time, especially if you put anything else on top.
Archival boxes
These are the best option for your albums and scrapbooks (and photos!) for long-term preservation. If you have no intentions of future digitization, keep them safe longer in an archival box, but make sure it’s worthy of your belongings. Look for acid-free boxes, and anything you purchase should say that it’s archival quality.
Weather-proof plastic containers
There are plenty of shapes and sizes available from various retailers. Once you find the right variety for your storage space and album size, keep a few things in mind while placing your keepsakes inside.
Put your albums in spine-down and pack them tightly.
Anything with a cover made of fabric, leather, or loosely bound with string should be wrapped in linen or acid-free paper and placed flat.
Don’t let oversized albums bend over anything. If you’re going to stack them, make sure the biggest ones are on the bottom.
Label your boxes
Labeling will help you in the future when you are ready to preserve everything digitally, or you want to find a specific album. You can use these PicMonkey tools to create some beautiful labels for all of your boxes.

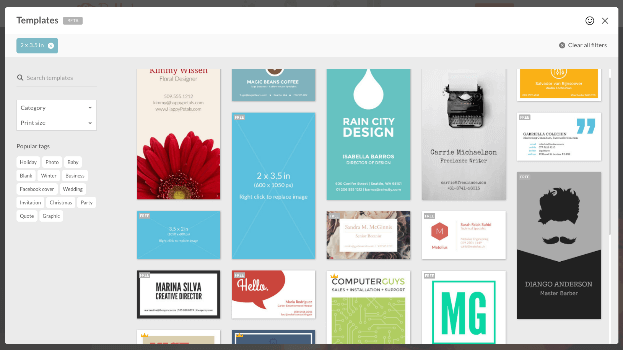
Search PicMonkey templates by size, like 2 x 3.5 inches, and find one that works for you. A horizontal layout works best for this project.
The Framing Device business card template is perfect for a label. The text is easy to edit, and you can even change the fonts. Don’t worry if your albums are not as detailed or easy to date as this example. As long as you can note the contents of your boxes, it will be helpful in the future.
If the background picture (like the floral design in this example) isn’t your style, right-click and select one of the “Replace from” options to easily swap in a new image.

Now you’ve changed the background without affecting the text of your label! Save this and update the text on each label for each box. You can either tape them directly onto the boxes or put them in plastic sleeves that adhere right to the box and make it easy to slip labels in and out.
