At the pace of digital marketing today, we know you need the fastest way to create high quality visuals to power your brand. One way to work faster is to work together, and that’s why we added collaboration tools to our photo editing and design platform. Watch our video tutorial to learn all about it, or scroll down if you’d rather read about it.
Collaboration in PicMonkey is about three things: real-time co-editing, Shared Spaces, and commenting. Let’s take a closer look.
Co-edit in real time

You can edit an image at the same exact time as other people on your team are editing it. You’ll see your teammates’ avatars at the top of the editor, and you can watch them make changes to the design. They’ll see what you’re doing too—color-coded bounding boxes show who’s doing what.
Woot! This means you no longer need to pass designs back and forth, waiting for your teammates to make revisions. Our online collaboration tools are like Google Docs for design. Let’s take a closer look.
Create a shared folder
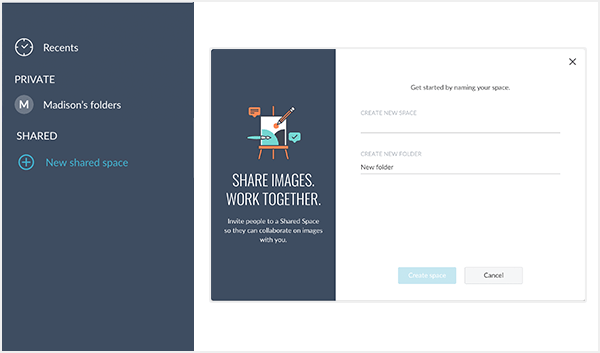
Before you can co-design with someone, you need to set up a shared folder. A shared folder is where you keep images you’re working on, store shared assets like logos, and manage roles and permissions. Just go to your Hub, and in the left panel, click New shared folder. Give it a name, and off you go.
Invite people to collaborate
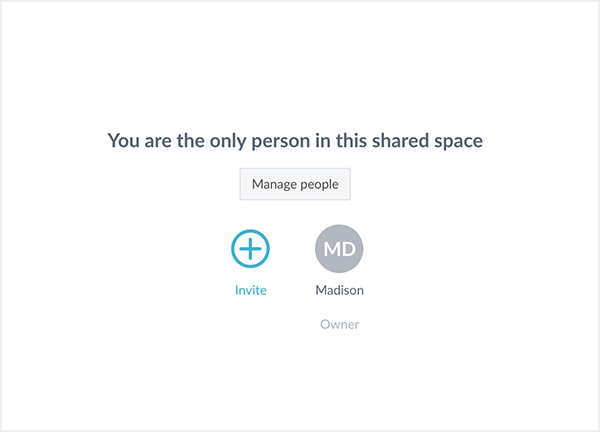
Having a shared folder all to yourself kinda limits the amount of sharing you can do. So click Invite and bring ’em in via email or shareable link. You’ll set their roles, which establishes what they can and cannot do to images in this shared folder.
Add images to your shared folders
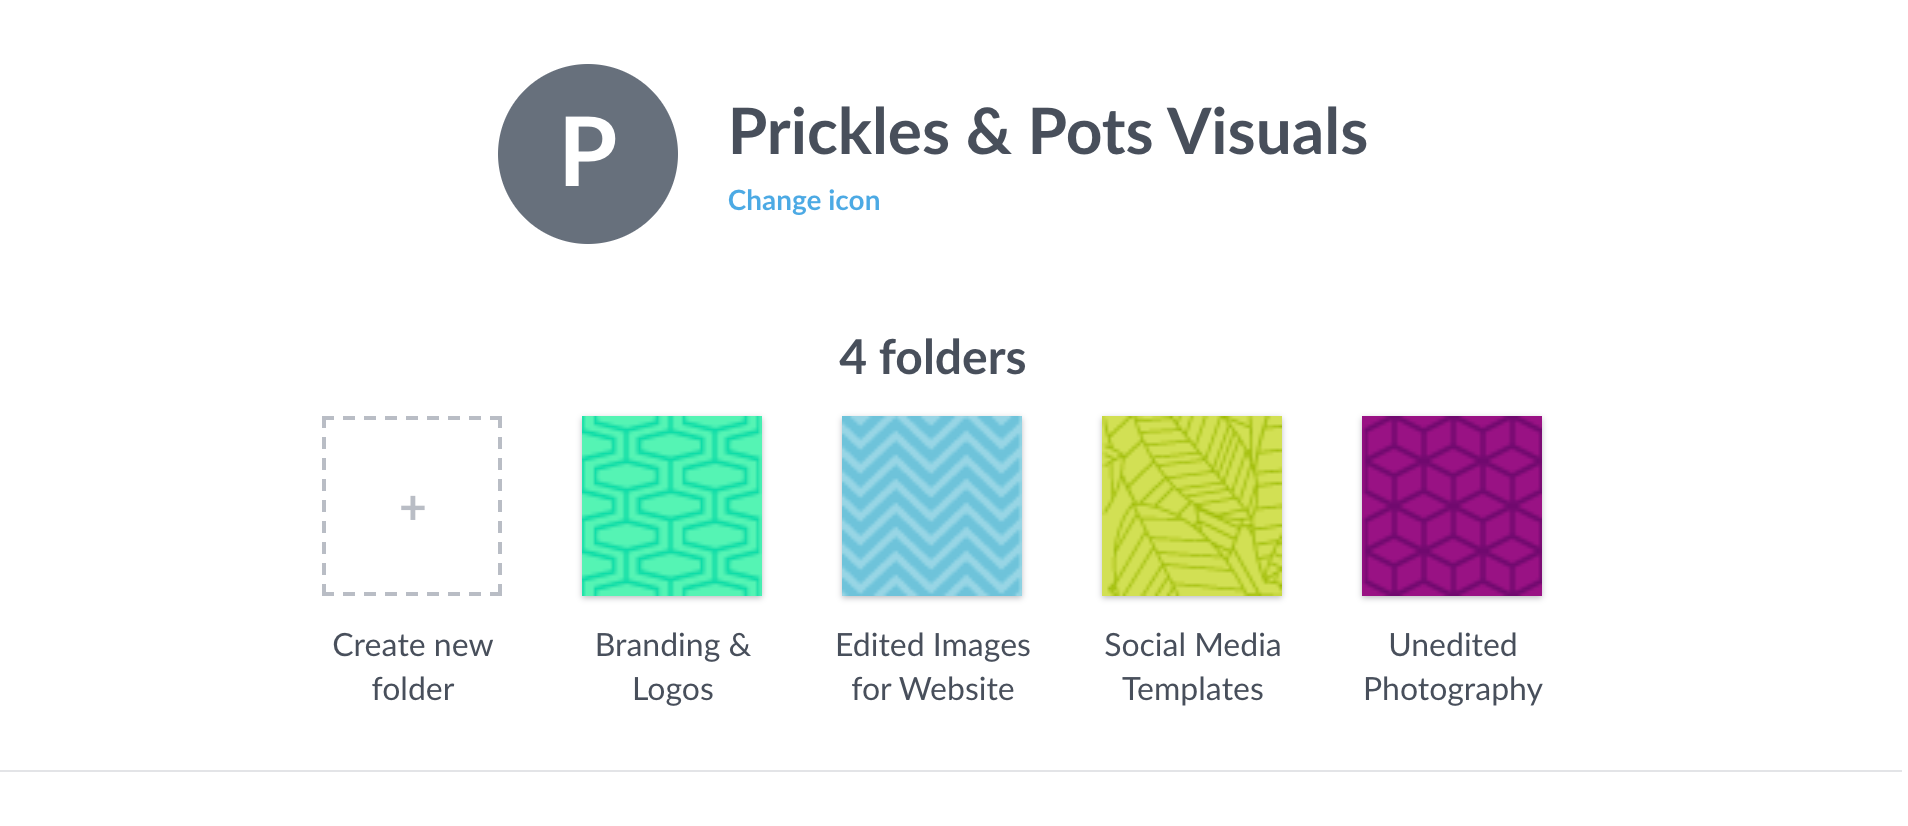
You can have many sub-folders inside of your shared folder. To start adding images, you need to create at least one shared sub-folder. Choose a folder to add images to, or create a new one by clicking Create new folder and type the new folder name. Add images by clicking the little arrow-in-a-cloud icon at the top of the image gallery, or by clicking the Upload button you’ll see when it’s empty.
All the images in your shared folder show in the gallery area, just as they do in other Hub folders. Add as many folders as you need. Organize them by project, by client, or by image type. Everyone in that shared folder has access to every image in every sub-folder.
Comment on images
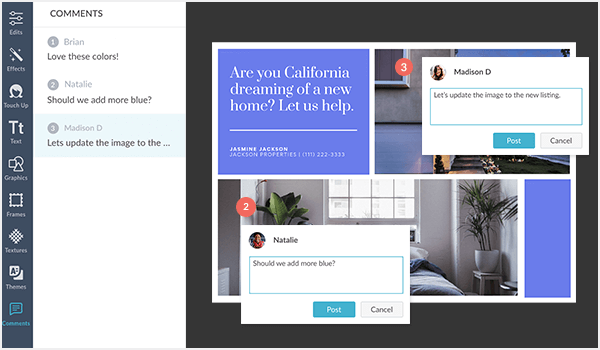
For those times when collaborating with your crew requires verbal communication, use commenting. Click the Comments tab on the left navigation bar while you have an image open in the editor, then click the area on your image where you’d like one to appear. After you add your comment, it’s marked by a numbered red circle. You and your collaborators can click the circle and read, resolve, or respond to the comment.
You and your colleagues get notifications when someone comments on an image in one of your Shared folders—the notification bell icon in the upper right corner of the editor will show a red dot. Click it to see a quick list of the comments added and then open the image to get the complete version.
Invite collaborators from the editor
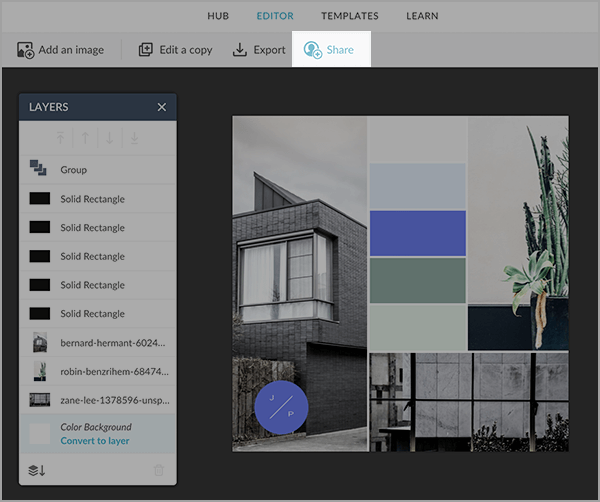
If you want to invite people to work an image you’ve got open in the editor, no problem. Click Share in the top toolbar. You’ll need to choose the share folder that the image will be kept in, and then you can add your collaborator/s.
Online collaboration tools will change your game
What it all adds up to is this: collaboration helps your team work more efficiently and effectively, reducing review cycles and getting more done faster. And the real bonus: your designs are gonna kick booty. If you’re still unsure about it all, have a look at how collaboration has changed the way we work, at PicMonkey.
Learn more photo editing tips: Blur Backgrounds, Mirror Image Effect, Film Grain Look, Make Photo Art, Blur Whole Images, Cartoon Look, Vintage Effects
