Sometimes great pics happen when you least expect them—like when you’re out snapping with your phone. Instead of having to wait to lay claim to those accidentally awesome images until you can bust out your computer, watermark them ASAP with the free (yes, free!) PicMonkey mobile app!


Our app is equipped with a feature that lets you use your own images as graphics (a.k.a. stickers in the mobile app realm)—that means you can watermark, layer pics on top of each other, add your logo to product shots, and satisfy any other creative image-layering craving you may have, all from your phone or iPad. If you’ve used your own graphics on PicMonkey.com, you’re already familiar with this idea. Ready to give it a whirl? Fire up your app and follow along!
1. Open your photo in the PicMonkey mobile app

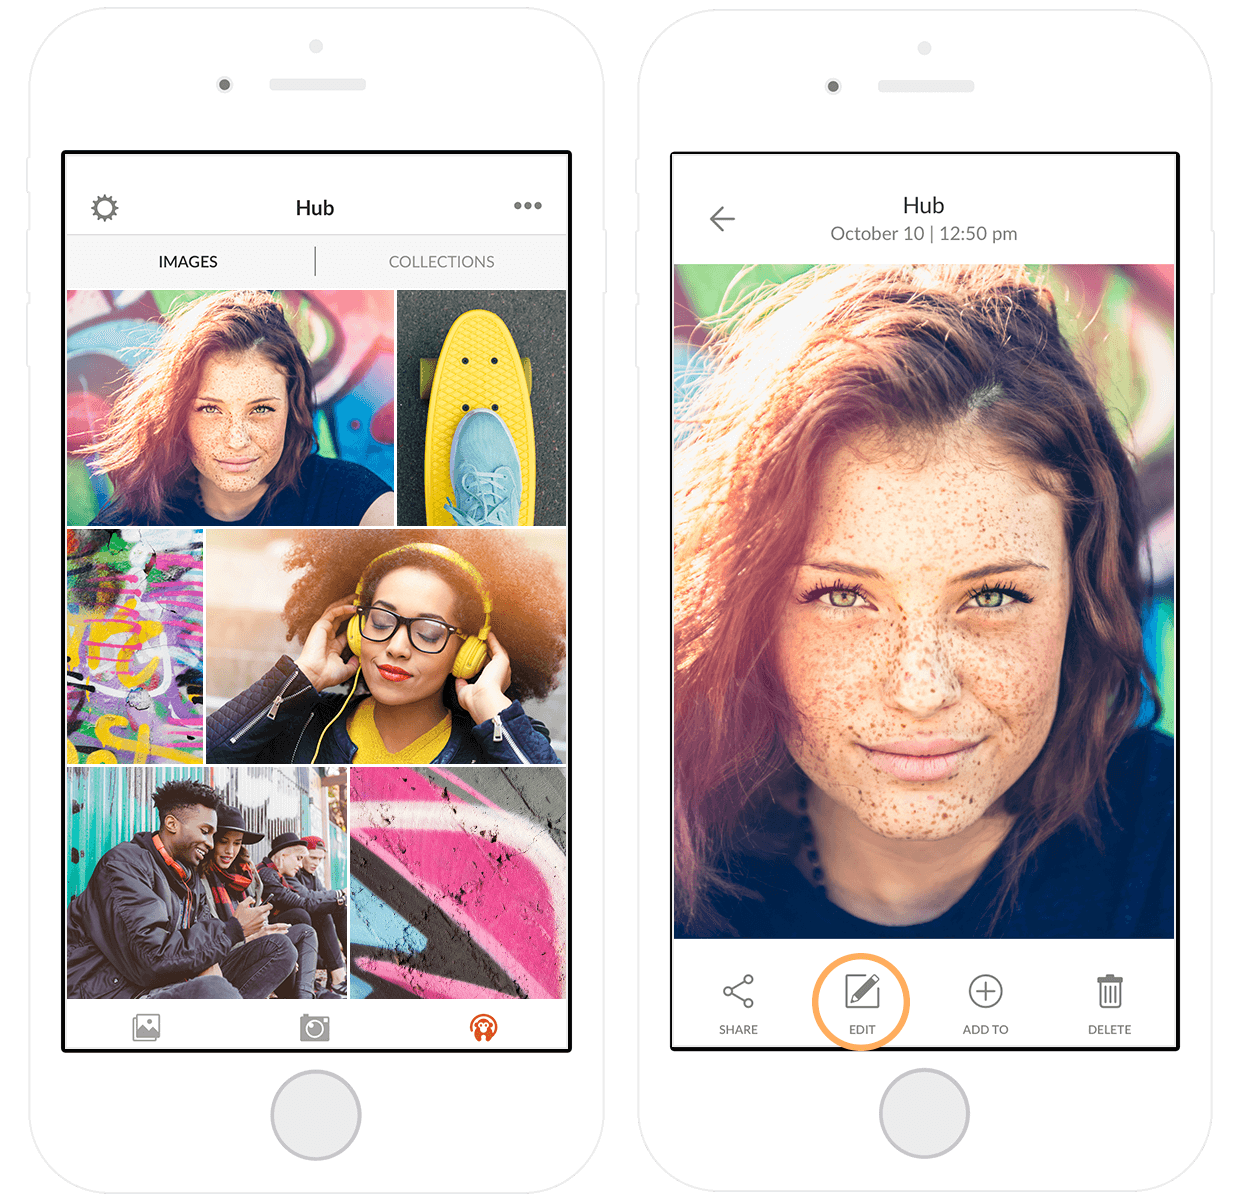
You can open a photo from your Photos/Camera roll, take a new photo, or open one from Hub. Never heard of Hub? It’s PicMonkey’s magical cloud storage feature and your personal project keeper. When you save an image to Hub from your mobile device, you can open it on PicMonkey.com (and vice versa), no uploading/importing required.
No matter where the image you wanna beautify comes from, you’ll need to tap Edit to start, well, editing.
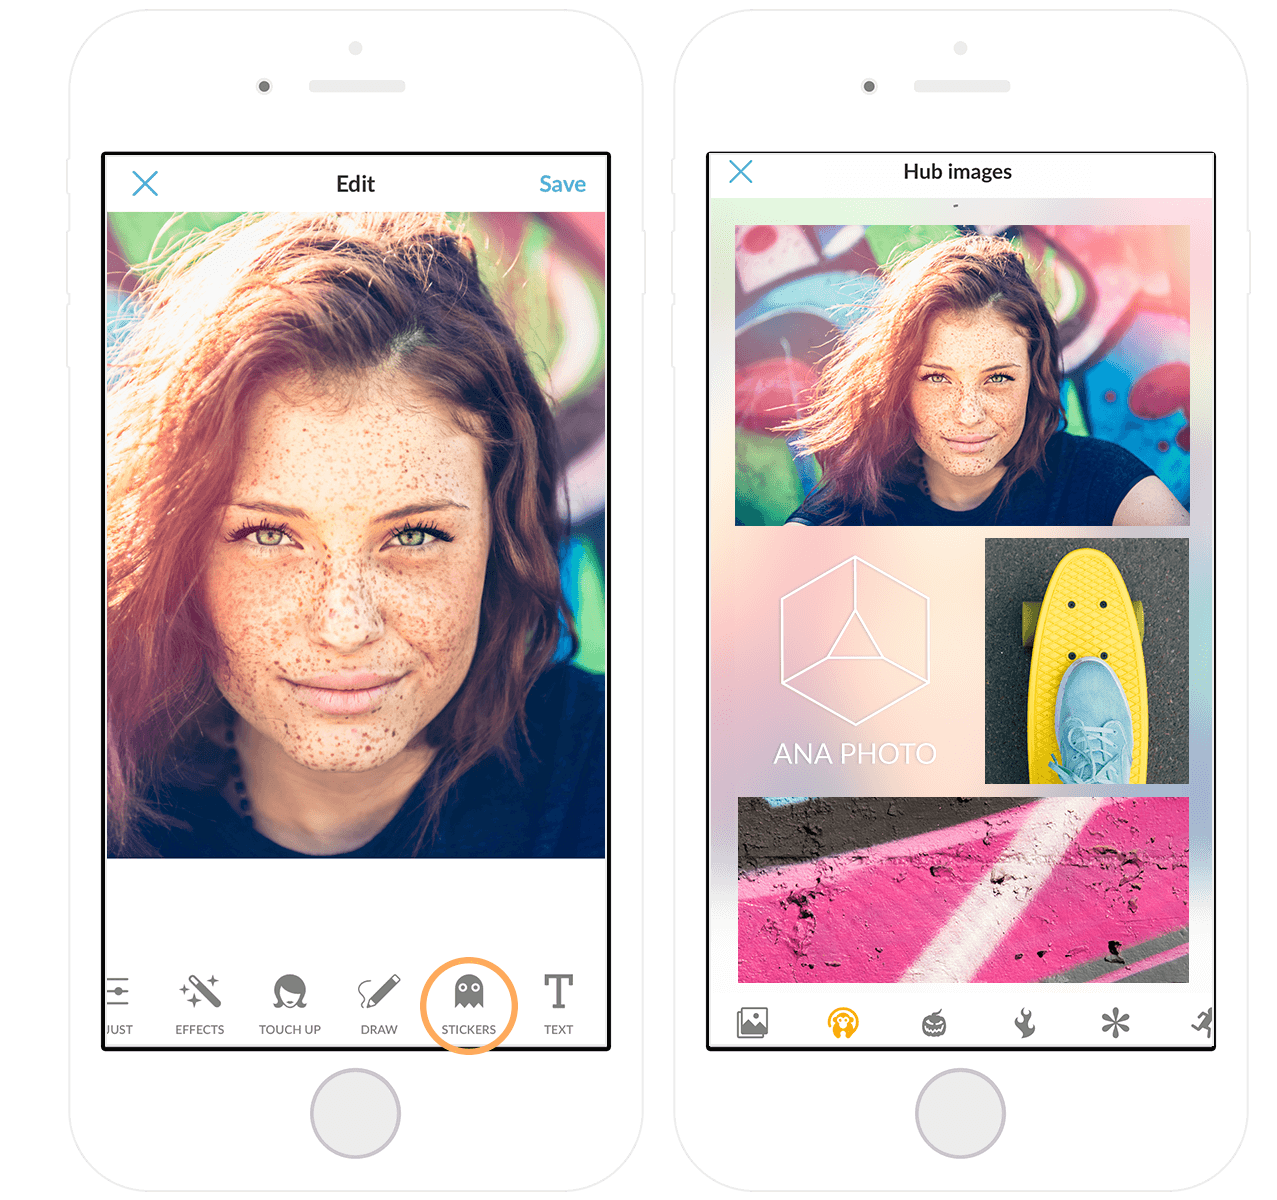
2. Head to Graphics

Notice all the options that appear in the editing toolbar underneath your photo. Tap Graphics (the ghost icon). You’ll see the Photos and Hub icons on the bottom, followed by other shapes that take you to our folder of mobile stickers. Tap Photos or Hub, depending on where the image you want to add is located. Now tap your image, and it’ll open on top of your pic!
3. Customize

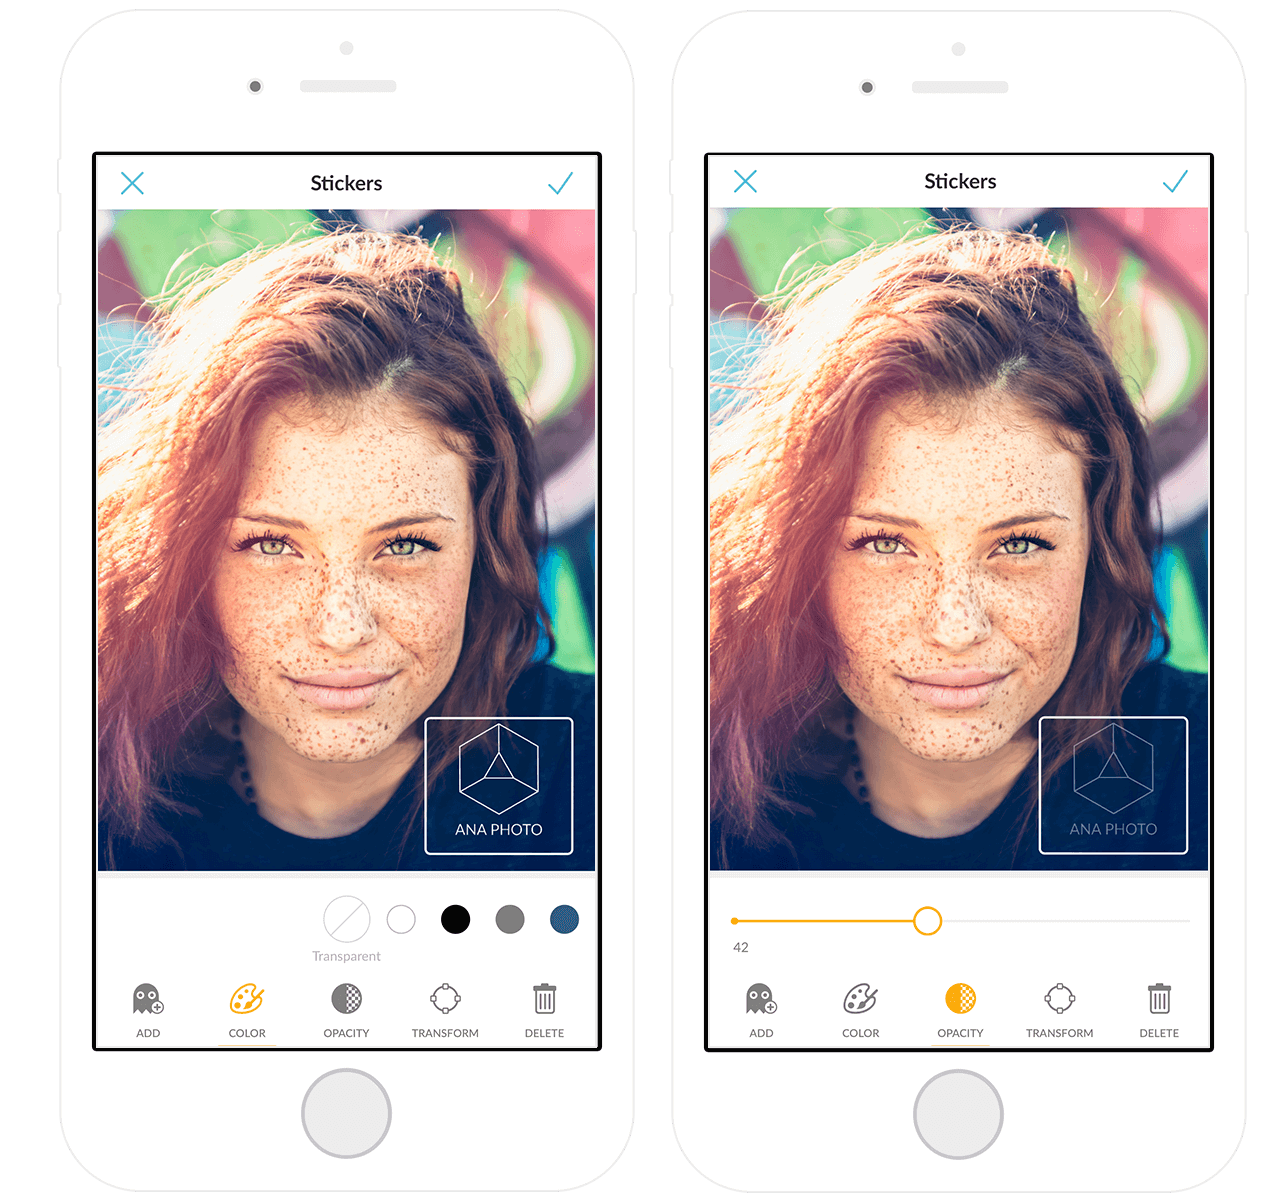
When you use an image as a graphic, it works just like any of our mobile stickers. That means you can adjust the opacity (which is suuuuper useful when watermarking), move them around, change up the color, and make them bigger or smaller super fast. Tap Transform to flip it horizontally or vertically, or duplicate your custom stickerfied image.
Layering multiple stickers/graphics? Use the Layers palette (the stacked squares icon) in the upper right corner to rearrange your layers. Alternatively, you can press and hold a graphic to bring up the options to move to back, to front, to duplicate, or to delete.
Bonus! If you wanna watermark your photo, but don’t have a logo yet, try making one with our curved text feature. Just type out your company name, tap the Curve button and slide the slider to adjust the amount of curve.
Beyond watermarking photos
Now that you’ve got the basic rundown on how to use your own images as graphics in our app, let your creativity run free! Sure, watermarking is a breeze, but you can also use this feature in all kinds of ways. Here are a couple ideas to get your wheels turning:
Make a double-exposure-inspired image. Love the picture-in-picture look of double exposure images? Try it out by layering pics in our mobile app and adjusting the opacity! You can also get super fine-tuned when you erase away parts of the sticker. These look especially rad if you add a nature shot on top of a portrait, and turn one black and white with the B&W effect.
Create a branded social post. Add your logo to a pic, along with any other stickers (our geometric shapes are pretty useful), and use our preset social crop sizes to make a perfect post in minutes
Add images to a blank canvas. Feeling a little design-y? Start with a blank canvas and then add your image on top. Hello, crafty-looking collages!


