Creating a flat lay photo is one of the easiest ways to take your Instagram posts from “nice” to “Are you a production designer? This looks like it was in Vogue.” Whether you want to create some sweet Facebook ads for your small business or up your personal branding game, we’ll take you through all the steps to creating the perfect flat lay photo. Peep this video to get started quickly, or scroll down for some in-depth tips.
What is flat lay photography?
Flat lay photos are images shot directly from above. Think bird's eye view, with said view consisting of a beautiful arrangement of objects. Great flat lay photography tells a story through its objects, colors, and organization. It's become immensely popular over the past few years, showing up frequently on social media. Personal brands use flat lays, company brands use flat lays...
...errrybody uses flat lays. Now let's walk through some flat lay photography ideas to learn how to use 'em yourself.
1. Get inspired by flat lay photos
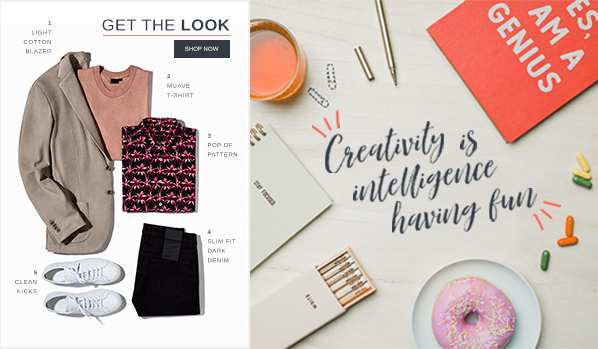
If you’re not sure where to get started, or what direction you wanna take, we suggest browsing Pinterest or Instagram with the #flatlay to get an idea of what looks you like. Or browse our Pinterest pins and other templates for inspo.
2. Assemble your props like a pro

Just like props exist in theatre to amplify the scene, props are used in flat lay photography to amp up the pic. Follow these intuitive tips to assemble your best-laid photo (pun intended).
Appropriate theme
Consider the focus of your flat lay photo. If it's business-driven, maybe you have a beauty blog and the answer is super straightforward (cosmetics!), or maybe you’re going for something a little less concrete (like trying to capture the feeling of excitement before an impending journey). Whatever it might be, establish a theme and keep it in mind while selecting your props so you end up with a cohesive look.
Prop type
Let's talk prop type. Props can be neutral or universal objects like plants, books, paperweights, or everyday knickknacks you'd find around the house that photograph well. You don't want to detract attention from the main subject – only to have complementary objects that will enhance the photo.
If you're in the health and wellness field, consider stones and crystals, or yoga-focused objects. Decor with motivational quotes is always a good idea, too. Consider what energy or vibe different objects give off as you begin to assemble them. And put yourself in your ideal audience's shoes – how does this flat lay make you feel to observe it from the opposite perspective?
Prop volume
Don't be shy – pick a lot of props (more than you would conceivably use) so that you can swap things in and out while you compose your shot. As you begin to shoot, you don't want to have to go back to your in-home shopping spree. The small adjustments you make can be intuitive and result in the perfect, marketable flat lay photo.
Prop color
As you peruse your home for props, it helps to have a color palette in mind. Different colors prompt different moods and feelings in an audience, so consider color theory as you prep. How does your variety of props make you feel as they lay together? How would you like to feel? Let these decisions inform your focus.
Diverse shapes and sizes
Lastly, go for objects of varying shapes and sizes in order to prompt visual interest. What just looks good together? Trust your gut. Maybe too many bulky objects clash. Maybe alternating objects as big, small, big, small, looks too staged. Create balance in your photo by mixing smaller objects with larger objects in a subtle way and placing objects of similar colors on both sides of the image.
This is a great time to consider diversifying textures as well — whether that pertains to your background or the objects themselves. Soft, rough, hard, smooth. Just like we desire foods to have a balance of salt, sour, bitter, and sweet, the same is true here. Balance is key. As you keep finding inspiration at home and on social, you'll get clear about what exactly feels right.
Pro Tip: If you don't feel you can capture everything all in one shot (we believe in you) – have no fear! Use PicMonkey's countless photo editing tools to sharpen, brighten, adjust colors, crop, resize, and more post-photoshoot. We also have some thoughts on adding in texture before sharing your creation with the world, which can be found here.
Be fluid, be creative, be flexible!
3. Grab an extra pair of hands to assemble the flat lay
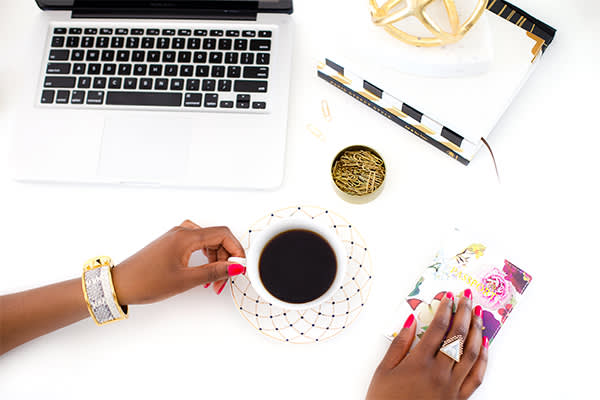
Some of our favorite flat lay photos look more “candid” because they include people (or, more accurately, body parts). If you want to create a look that has a sense of movement and action, consider enlisting the help of a friend. It’ll be way easier/less impossible than trying to pose and photograph yourself.
4. Pick a flat lay friendly background
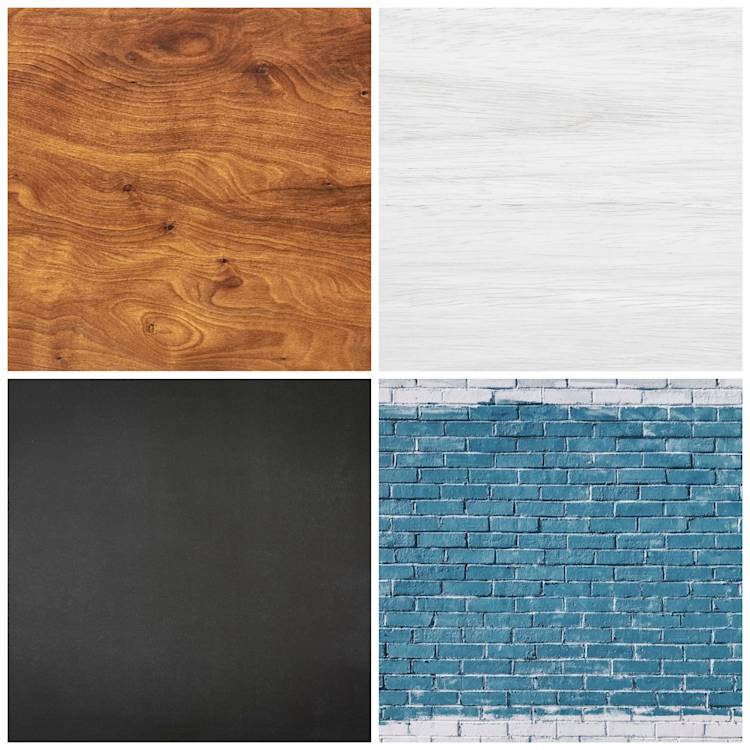
When choosing a background, it’s best to keep things simple. A plain white background works well because it won’t distract from your props, but you can also pick something neutral like a wood floor or table. If you want to use a colored background, you can get crafty by taping some matte wrapping paper on a floor or table.
Or, if you'll be doing flat lays consistently, consider investing in some vinyl backdrops to easily create a rustic look. You can also magically erase any background you have after the photo shoot and put in a new one with our automatic background remover tool.
5. Stage your flat lay photo
Now that you have all your props and your background, it’s time to get organized. Set up next to a window and try to shoot in the morning or late afternoon when you’ll get the best light. Try not to use a flash, as this will create shadows.
When setting up your shot, leave a little bit of space between each object. This will help highlight each prop and keep your shot from looking cluttered.
If you plan on posting your photo to Instagram, a square layout looks really nice. If you’re shooting with your phone, it’s easy to set up a shot by picking the square setting in your camera.
6. Leave space for text and graphics
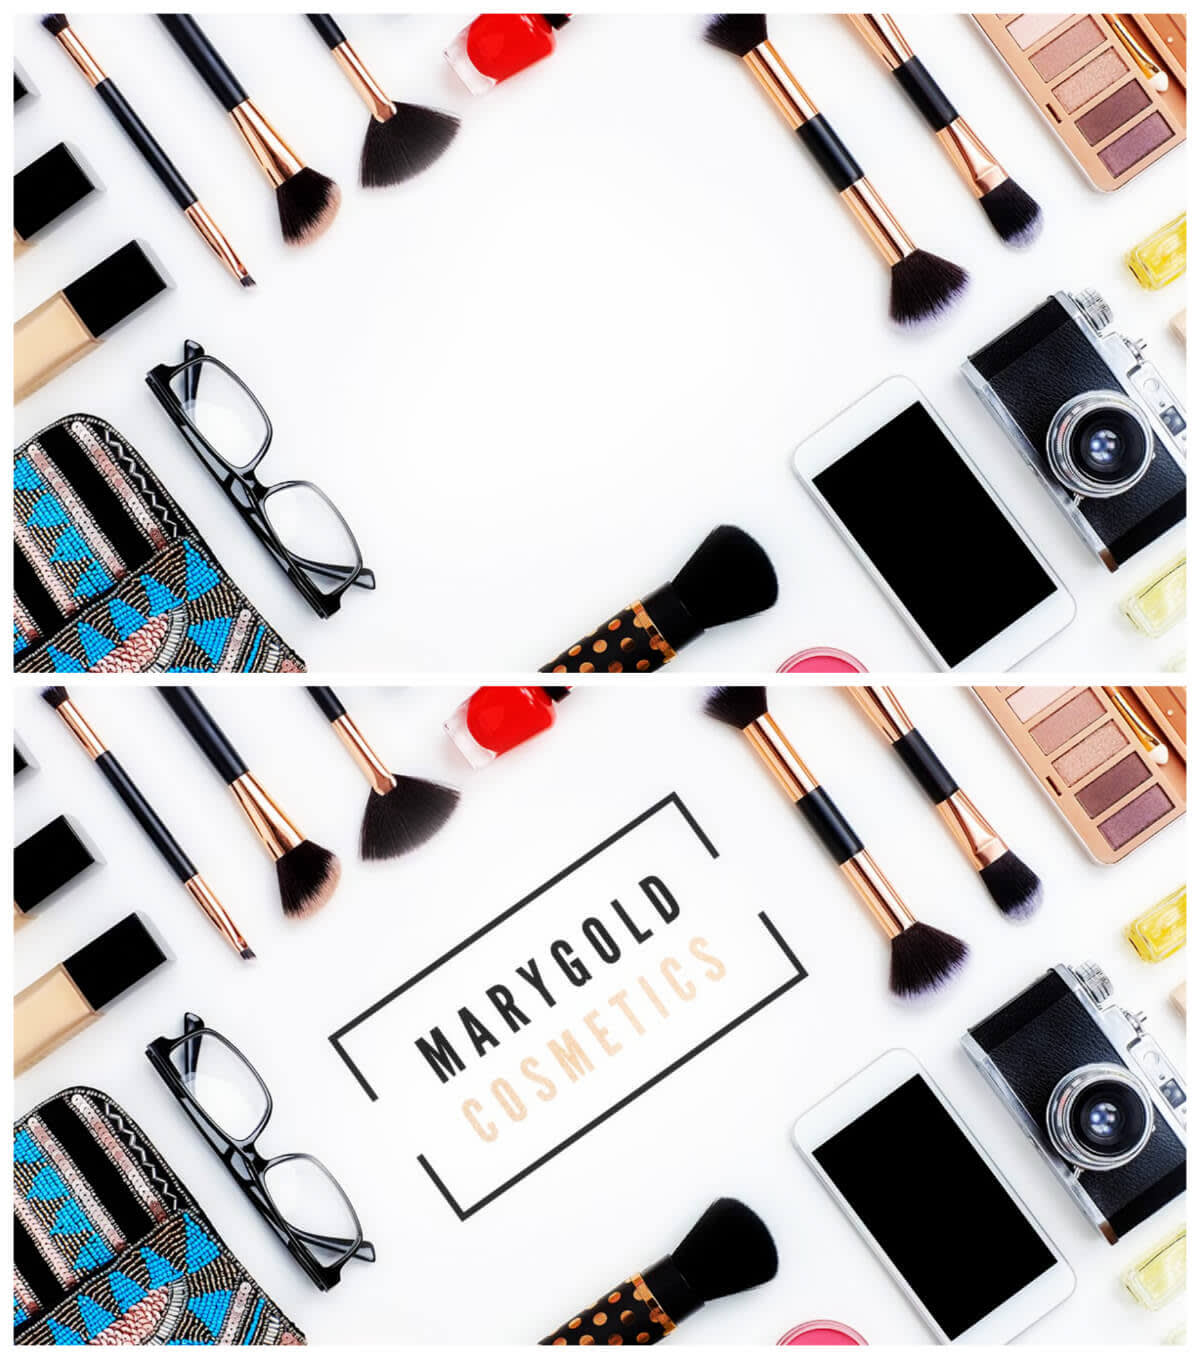
You might want to leave some space where you can add text or graphics in post-production. If you’re creating an ad, this is where you can add your brand name and logo. Or if you’re going for a more inspirational look, you can stick in a quote.
7. Shoot from above
Climb up on a ladder or step stool and get to shooting. Creating distance between you and the flat lay will help you fit everything into the shot. This is also one of the only ways to ensure that your photo actually looks flat.
Once you’re up there, take a few test shots and don’t be afraid to keep moving props around until it looks just right. When you have your perfect shot, it’s time to edit!
8. Work some basic editing magic
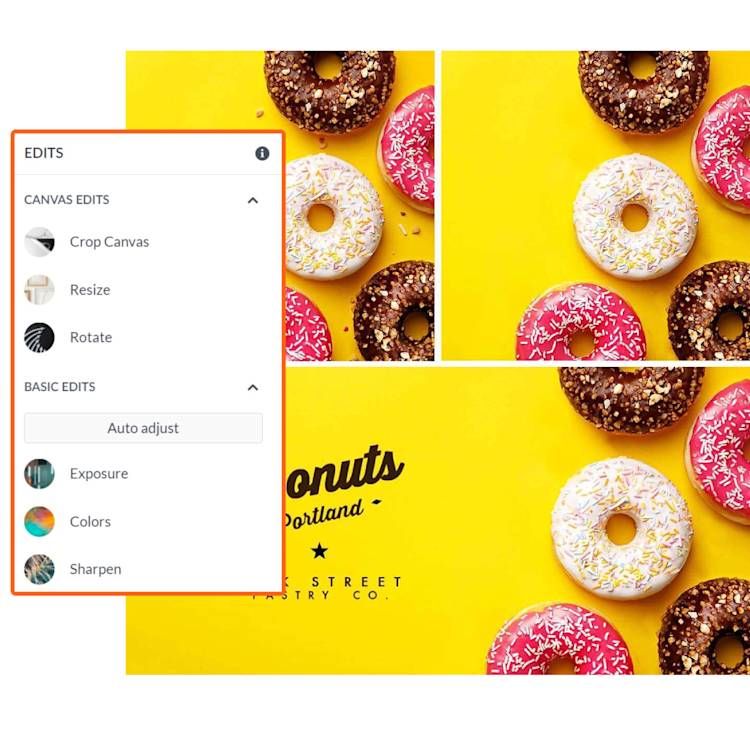
Start your flat lay design quickly with one of our designer-made templates.
You might have a great photo (we knew you could do it), but a few simple edits to your image's colors, exposure, and clarity can seriously up the wow factor.
To make these edits in PicMonkey:
Open your image in PicMonkey's editor and find Edits on the left menu.
Size your image correctly (if needed) with the Resize tool. Or start your project with a pre-sized blank canvas or template before adding your photo. PicMonkey subscribers can also use our lightning-fast Smart Resize tool to output your design in multiple formats, all while keeping its quality intact.
Colors: Adjust the Saturation slider to make your colors pop.
Exposure: Use the Contrast slider to either brighten your image or make it a little more sultry.
Sharpen: If needed, use the sliders available to make your image crystal clear.
If you want a one-click solution, you can also try out the Auto adjust button at the top of the Basic Edits menu and let PicMonkey work its magic. If you don’t love the results, just click the Undo button in the bottom toolbar.
9. Add text and graphics
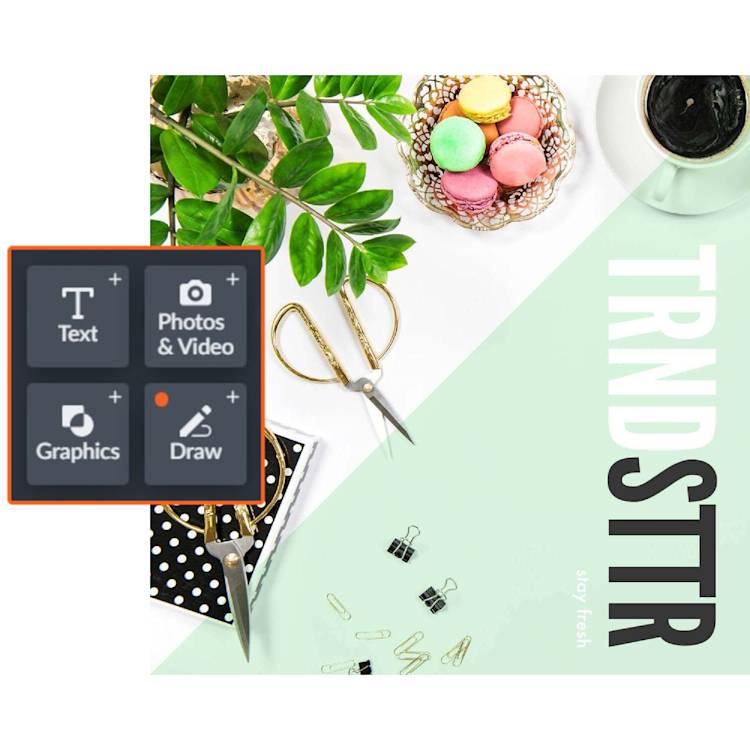
If you left space in your image for text and graphics, now’s the time to add them in.
To add text and graphics in PicMonkey:
Go to either the Text tab (T icon) or Graphics tab (shapes icon).
Add your text and/or graphics.
Use the respective tool menus on the left panel to customize.
To learn more about our text and graphics tools, check out:
10. Post it and bask in the glory of your social media savvy
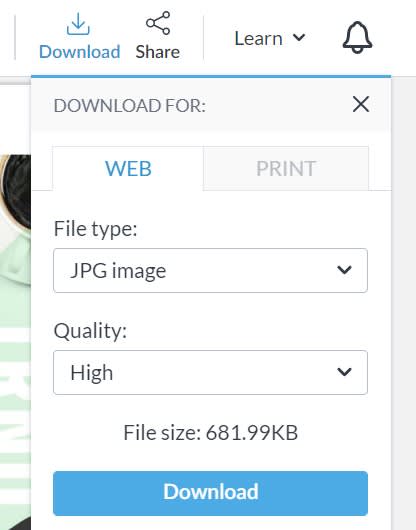
You probably didn't spend all this time on your flat lay photo just to let it sit. Time to share with the world! When you're all done designing in PicMonkey, you have two options:
Click Download on the top toolbar to download your design to your computer as a JPG or PNG (or PDF for Pro subscribers).
Click Share to post directly to social.
Note that the latest version of your design is automatically saved to Hub, PicMonkey's cloud storage, so you can always return to it at a later time. Now get out the sunscreen to protect your skin from the shiny glow of your social feed on fiiiiire! And, while you're out there checking all of your social media praise, be sure to download the PicMonkey mobile app if you haven't already so you can access, save, and edit your designs on the fly!

Get the PicMonkey Mobile App!

