Need to crop a photo? Check! Wanna design an entire portfolio of brand assets? Check! Would you like to apply layer upon layer of graphics and text and textures and be able to edit this multi-layered project again and again? Check! PicMonkey is continually adding features, functionality, and collaboration capabilities that will help you create some terrific designs for business and personal use. Let’s take a look at how to use PicMonkey.
Edit a photo
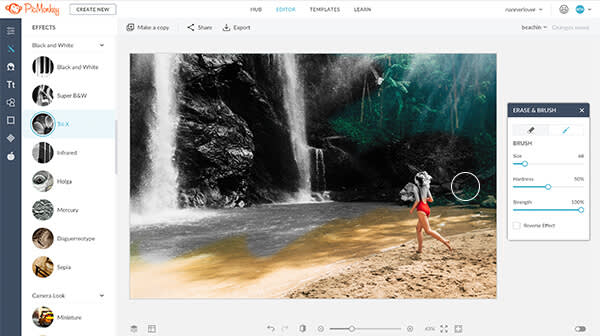
Click the Create new button to open an image in the editor. Once you’ve opened an image, take a trip to the left side of the workspace and see what you can do to it. As soon as you start working, PicMonkey stores the image in your own cloud-based Hub so you can access it from anywhere.
The Edit tab has basic editing features such as crop, resize, and rotation. The Effects tab is where you’ll find the cool stuff that lets you play with light, exposure, grain, and color—this is where you can make your pics shine (literally).
You can control the amount and placement of effects—in addition to applying an effect to the entire pic, you can use the brush tool to paint the effect on a specific part of your image. This is a great way to add a color pop to a black and white photo, for example, or to lighten a shadow cast by a hat visor.
PicMonkey also includes a host of Touch Up tools (Guess what tab they’re in?) that help you make the most of a bad hair day, remove a blemish, change eye color, and sculpt contours like Michelangelo. Click one of the tools, adjust the parameters, and give your subject a new look.
Create a design
We’ve got over 3,000 artist-crafted templates that cover all kinds of business and personal designs. Just click Templates at the top of your screen and choose a category, or scroll down to see them all. We’re sure you’ll find something that fits the bill. Change the images, edit the text, swap colors, whatever you need to do to make it exactly what you want.
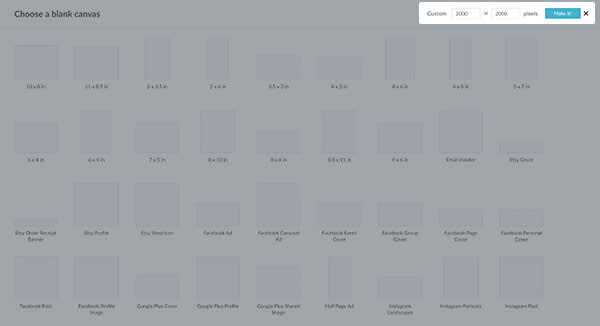
Even though our templates are pretty wonderful, we know that there are a lot of times when you just gotta be you. PicMonkey gives you the freedom to start with the old tabula rasa and create something completely original and amazing. PicMonkey offers over 70 blank canvases, sized for traditional photos (3×5 inches, 5×7, 8×10, etc.) and for specific social media needs (Etsy shop icon, Facebook covers, Instagram posts, Twitter profile, YouTube thumbnail, etc.). Click Blank canvas on the template page, then choose a preset size. Or type the dimensions into the size boxes in the upper-right corner, and you’re off to the races.
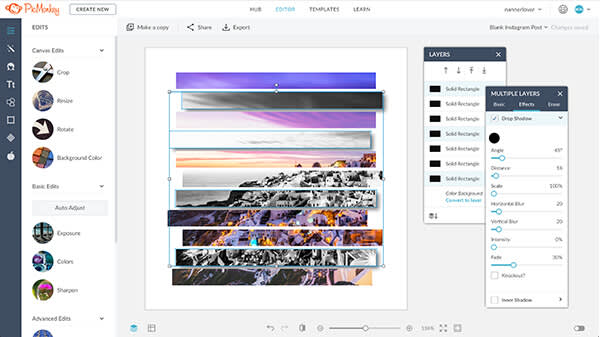
We’ve got tons of graphics you can add to your designs—they’re super customizable. Click the graphic to make the Graphic palette appear. There you’ll find controls for erasing parts of it, add drop shadows, apply effects, or add textures. It’s like you’ve given clipart a couple of energy drinks and a hardcore soundtrack.
Use the Layers palette (click the three stacked squares in the bottom toolbar) to select graphics, control the layer order, group them together for accurate positioning, and edit multiple layers at once. If you want one portion of your image to peek through a shape outline, take a look at masking. With just a bit of effort, this easy process can make you look like a pro.
Add text to designs
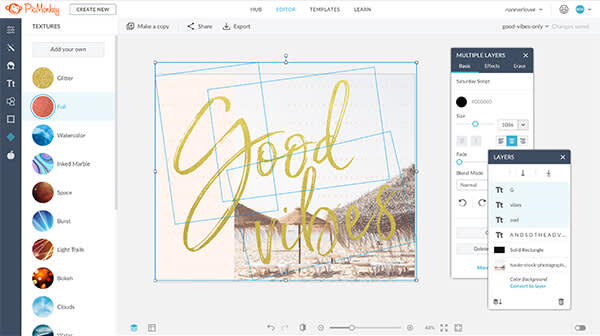
If a word falls on your image and there are no fonts to render it, does it have any meaning? That’s a discussion for a very different blog, but it’s not really an issue here, because we have plenty of fonts. Hundreds of them, actually, so you’ll find something you’ll like. If not, you can also use your own fonts in anything you create in PicMonkey. Just click Upload your own fonts in the text menu, and you can add them from your computer.
Sometimes a font is pretty close to what you want, but maybe a tweak would make it perfect. Go to the Text tab, select a font, click Add text, and type in the text box that appears over your image. In the Text palette that pops up, you can customize like crazy. Adjust the tracking of your letters using the Letter spacing slider, or change the space between lines of text with the Line Height slider. Curve your text or add shadows (Effects tab of the palette), change the color (color circles in the Basic tab of the palette). You can even go to the Textures tab on the left side of the editor and add a texture to the text, or use your words as a mask for another image. As we like to say, with PicMonkey, you can apply anything to anything.
Auto-save to the cloud
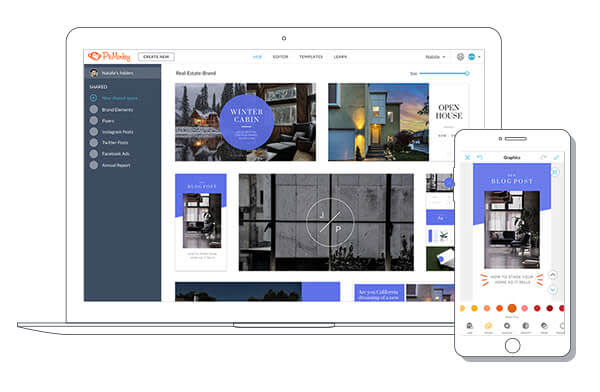
We’ve all had those “Now, where did I put that?” moments, but that won’t happen with PicMonkey. All of your images are auto-saved to Hub, your cloud-based mission control center. You can leave your images unsorted, or if you’re terribly ambitious and organized you can group your images into collections — both private and shared. Put business projects in one, personal projects in another, reusable components in another, or whatever works for you. Shared Spaces in Hub gives you the flexibility to easily share files and collaborate with teammates and clients. You can assign editing permissions to whomever you wish, and everyone’s work will be saved in the same place.
Since your Hub is in the cloud, you can work on your images from anywhere. And with the free PicMonkey mobile app, you’ve got all the image editing features you need wherever you go. Start projects when you’re out and about, and finish them when you get back to your desk. Or start at your desk and head out into the field to take the exact pic you need to finish up.
One of the best things about Hub is that your images are re-editable—the layers aren’t flattened, so you can change them up anytime you go back to them.
Make cool things fast
Whether you’re using PicMonkey to grow your business or you’re just having some fun, you can be sure that our tips and tutorials will help you learn to make cool things fast.

