We think photo overlays are the greatest thing since sliced bread—and you should too! Whether you’re looking to amp up the silly factor in a photo by putting a mustache on your nephew, or you’re creating a seriously stylin’ graphic design, PicMonkey's versatile photo assets are here to help.
While some associate photo overlays with stickers or clip art, here in PicMonkeyland, we now call them graphics. Whatever name you fancy, this tutorial is all about showing you how to make a photo overlay that wows any audience. Let's get after it.
How to make a photo overlay for all skill levels
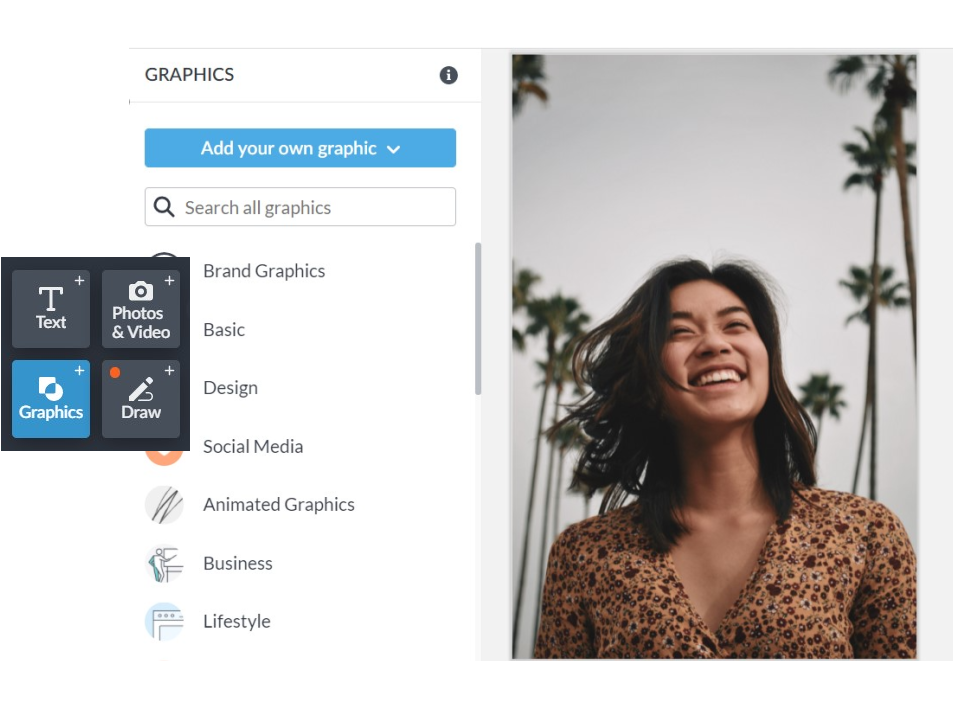
Learning how to create a photo overlay is fun and easy in the PicMonkey editor. Simply click the Graphics tab (shapes icon) on the left toolbar. From there you’ll find tons of options in our different graphic overlay groups, from classic shapes to multicolored artist-drawn confections like flowers and facial hair.
How to create photo overlays that rock
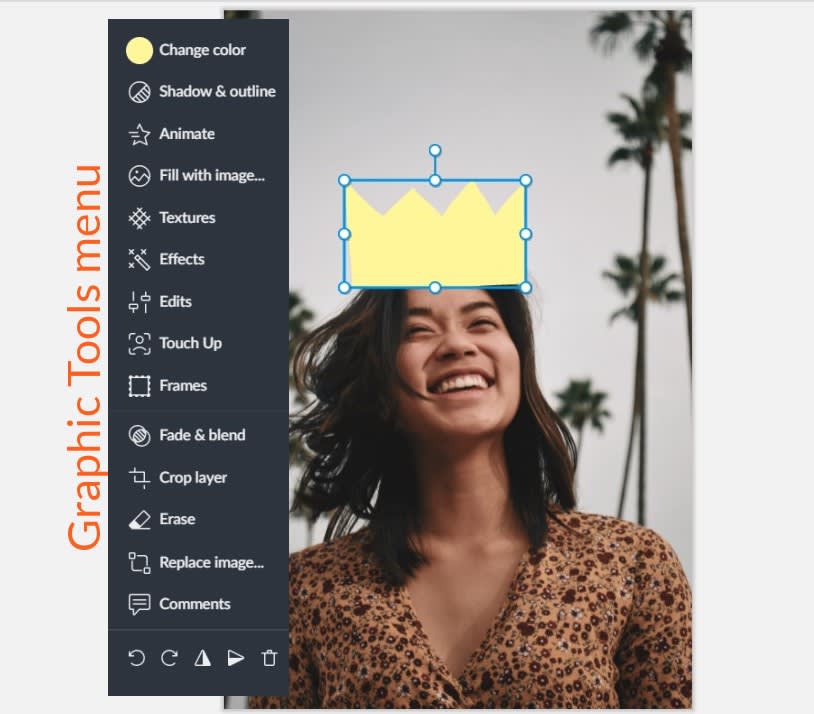
To add a graphic to your design canvas or photo, just select it, and voila! It shows up on the image instantly.
Drag the graphic to reposition it.
To resize the graphic while maintaining its aspect ratio, just pull its corner handles or sides to make it bigger, or pull it closer to make it smaller.
To change the photo overlay’s aspect ratio, press the Shift key on your keyboard while you push or pull on its sides. If you change your mind, right-click the graphic and select Original aspect ratio.
Use the Layers panel on the right-hand side to control how text and graphic elements are layered in your designs.
Flip graphics horizontally or vertically by clicking the horizontal and vertical flip buttons on the Graphic Tools menu. Rotate left or right 45-degrees at a time by clicking the rotate arrows.
Use the Graphic Tools menu to change the photo overlay’s color. Click the circular color icon on the left-hand side to explore different colors, enter a hex code, or use the eyedropper tool to extract colors from your images and create a brand palette. Rainbow Colors are pre-designated colors that you can choose from.
Blend modes and more in PicMonkey
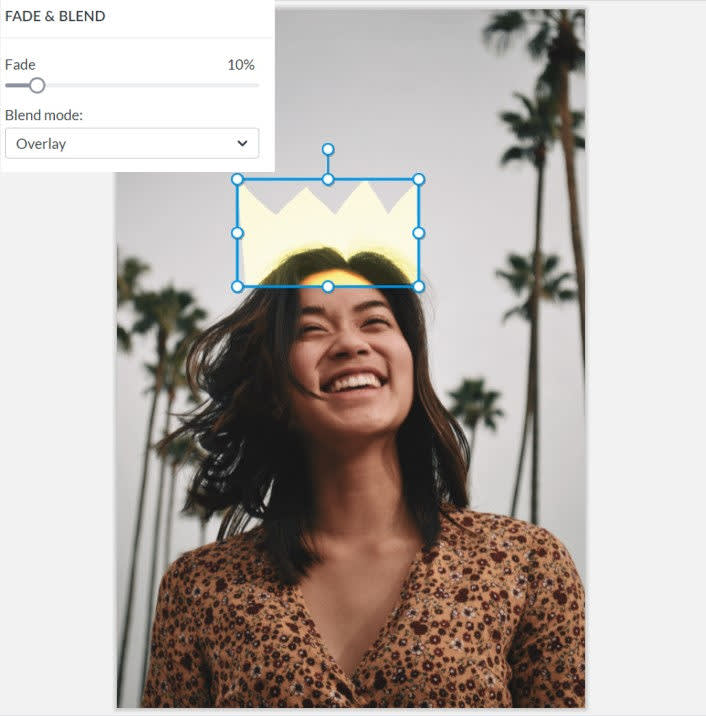
PicMonkey's photo overlay graphics also have a Fade & blend option. Fade adjusts the opacity, and blend affects transparency. Ultimately, these tools change how the graphic interacts with the elements behind it. Depending on what color your background is—as well as what color the overlay is—blend modes might look different each time. We suggest scrolling through them to preview how they’ll look before choosing one.
Right-clicking the overlay opens several new controls, including:
Straighten
Delete layer
Duplicate layer
When you duplicate a photo overlay, all the changes that you made to the original will be reflected in the duplicate.
How to erase photo overlays
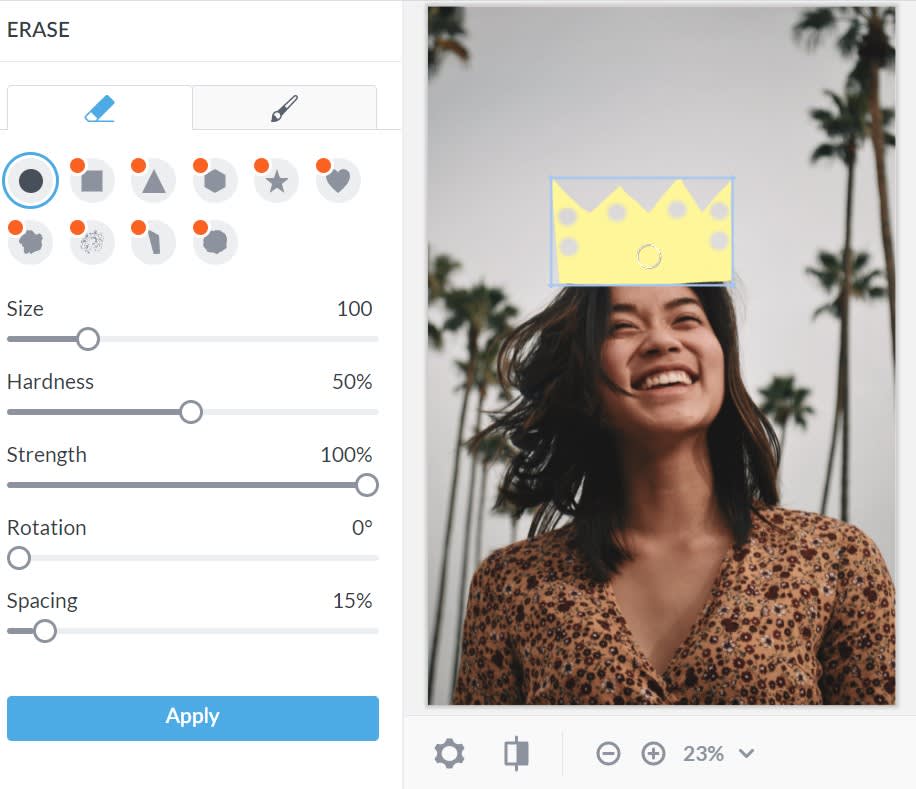
You can always erase parts of a graphic, too. This can come in handy if you want to create a background erase image or if you want to layer text and images. In the example above, we've used the eraser like a stamp on our crown graphic.
To erase part of a photo overlay graphic:
Zoom in (located on the bottom toolbar) to erase precisely.
Select the Eraser tab in the Graphic Tools menu.
Adjust your eraser size and hardness and erase away!
If you take off too much, not to fear! Click the paintbrush icon to paint it back on.
All subscribers have access to the circular erase tool. Pro subscribers get additional shapes like squares, stars, hearts, and more.
How to animate photo overlays
All the animation movements available to apply to your designs. Note that the green stars are looping motion animations, while the orange are entrance motion animations.
PicMonkey Pro subscribers have the power of animation at their disposal. Turn static graphics into animated GIFs for fun looks.
To animate a photo overlay graphic:
Select your graphic layer.
Click Animate on the Graphic Tools menu.
Choose your animation style.
Click the Play button to preview.
Download as a GIF or MP4 file.
To learn more about our awesome animation features, check out: How to Animate a Picture, Text, or Graphic
Add your own photo overlays
In addition to using PicMonkey’s overlays, you can also add your own and edit them in the PicMonkey. These overlays can be graphic elements like a logo, or they can be images that you want to use in a larger design. Instead of just layering graphics, try layering whole images for a cool photo-on-photo effect!
To add your own photo overlay:
Click the Add your own image button at the top of the graphics panel.
Find your photo and open it from wherever it’s stored.
Once you add the overlay to your design, you can edit it just like any other graphic.
Note that we do accept SVG files, which can be customized in PicMonkey.
Use your photo overlays in templates
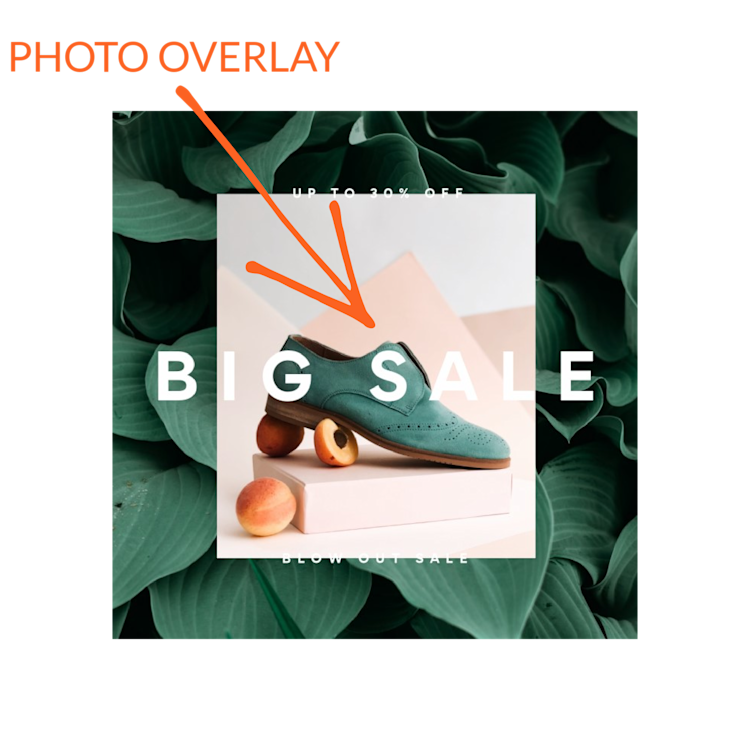
If you choose a pre-made template that has an image in it, that image will behave like your own overlay. To replace a template image with an image of your own, right-click its layer, then click Replace image from the Image Tools menu and select the storage option where your image lives. Your image will then be opened within the bounding box of the template image.
Why use photo overlays?
Alright, now that you know how to create a photo overlay, you might be wondering, why should I use them in the first place? Gone are the days people snap pics and keep them as is. Photo overlays simply transcend basic photo editing features, as they add these three main benefits:
Extra layers
Dimension
Texture
Simply add some oomph into your photo layers with our beautiful graphics, text, fonts, and effects. Beyond overlays being a fun and easy technique to use, they prompt greater impact upon audiences. Whether you're marketing your business, posting on social, or simply growing your own designing skills, photo overlays prompt the following emotional responses from viewers:
Intrigue
Interest
Complexity
Effective marketing is simple marketing. However, simple messaging leaves room for creative and artistic complexity. In other words, pair simple statements with abstract visuals. Capture attention by provoking positive emotional responses. Consider infusing color theory into your photo overlays to connect deeper with your audience. The longer people linger on something curious or different, the more engagement you'll have.
While there's no harm (ever) in letting your intuition guide you, consider mapping out your photo overlay intentions before creating. What's your goal? What response are you hoping for? Having a framework before you begin can guide you toward the right stylistic choices.
Now, go make your photos come alive with unforgettable overlays! We'll be on the lookout for your nuanced looks.
