
Checklists are a powerful tool when you need to break down a seemingly large and daunting task into actionable bites. Learning how to make a checklist can often be the difference between getting a project done on time versus scrambling to finish (and remember!) all of those tasks.
Why are checklists important?
Checklists are not only an important tool to keep your constant influx of tasks in order. Research suggests they drastically increase productivity levels, improve task performance, and keep your anxiety at ease. The simple satisfaction behind checking off a task is not just fun to do, it also helps our brains move onto the next task and effectively complete it.
The beauty of checklists is that they can be created for a wide variety of needs—projects, shopping lists, wish lists, planners, etc.—and catered to your motivational and working style.
How to make a checklist in 3 steps
Step 1: Jot down and categorize tasks by priority or type
First things first, set yourself up for success by brainstorming and jotting down the types of tasks you’re set on completing. Be sure to be specific in each task and avoid vague or broad terms.
Do these tasks follow a specific category, such as a daily or routine checklist, a shopping list, or a project checklist? Think about how you might arrange these tasks on a checklist and start categorizing by type or priority.
Doing the hard work now and getting your tasks sorted before transferring them to your official checklist will ensure you’re all organized and ready to smash your to-dos.
Step 2: Choose a checklist template
Next up, we’ll scour the Templates library in PicMonkey, found in the top left toolbar. By taking out the hard design work and giving you editable templates for every checklist type, we’re ensuring you’re set up to tackle those tasks sooner rather than later.
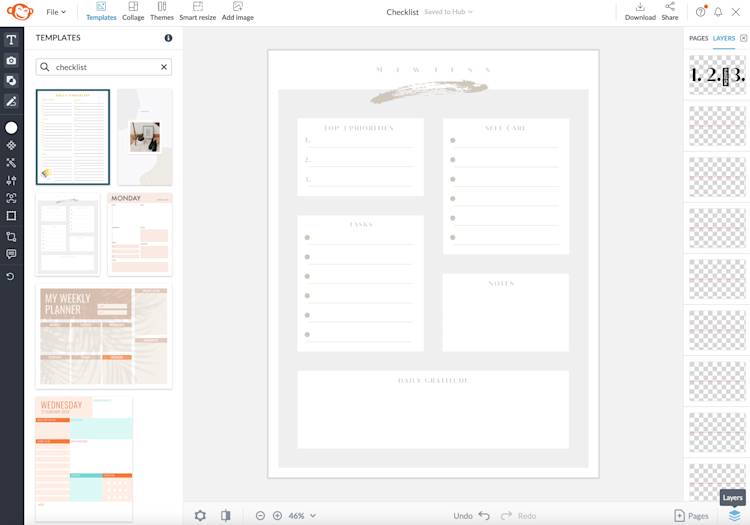
Make the checklist process even more enjoyable with PicMonkey’s checklist templates for every occasion.
Find the checklist style that speaks to you, whether that’s a planner-style list or a shopping list. Focus on the layouts here—we can easily swap out the font style, color, and patterns as needed later on.
Step 3: Customize to your heart’s content
We’ve arrived at the fun part of any checklist-making project: customizing. Lucky for you, PicMonkey has everything you need to make a stunning to-do list that you’re destined to complete:
A pro fonts library filled with sans serif, serif, handwriting, script, display, and monospaced fonts. Take a gander at all of the font styles we have to offer.
A color picker and gradient tool to add pizzazz to your checklist boxes, backgrounds, text, and more.
An extensive graphics library with editable icons, illustrations, and shapes sorted by category and style.
Numerous edits and effects to apply to your own photographs.
Endless textures and patterns to create a dazzling overlay or a checklist background that’ll get you inspired.
Now, what are you waiting for?! Let’s get to customizing!
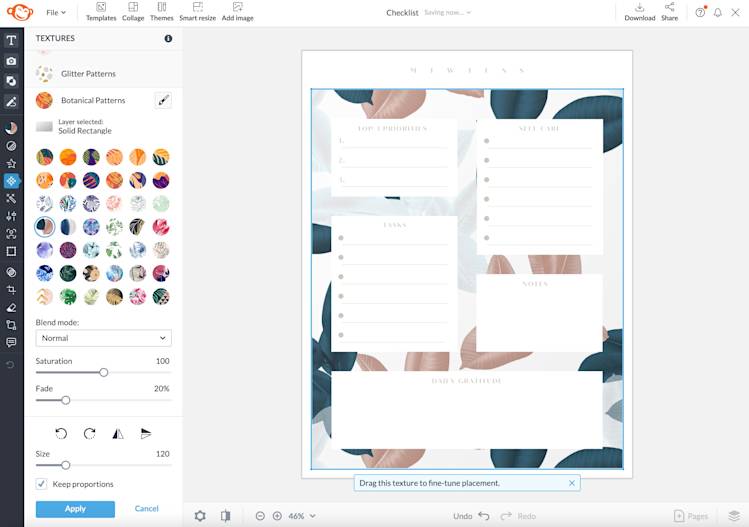
First off, set the tone of your checklist by selecting a background, whether in pattern, texture, photo, or gradient color form. In our example, we opened the Textures tab on the left and replaced our background layer with a Botanical Pattern texture.
To import your own photography, head on over to the Photos & Video tab and click Add photo or video (you can also browse PicMonkey's stock photo library).
TipMonkey: What's great about background elements is that you can easily layer them over one another to create a truly customized look for your checklist. Add in some paper grit by going back to the Textures tab and placing it over your current background. Then adjust the Fade slider for a subtle look.
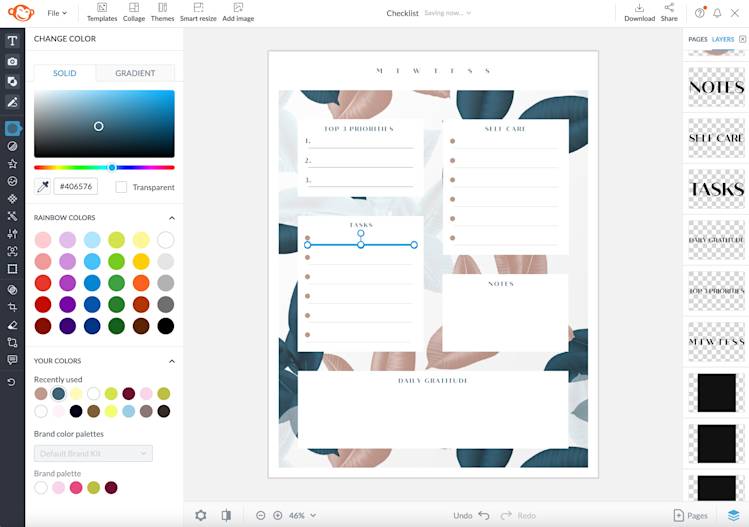
Next, select a design layer and click Change color on the left tools menu to browse solid and gradient color choices. Rinse and repeat until you’ve recolored your checklist design to match the vibe you want.
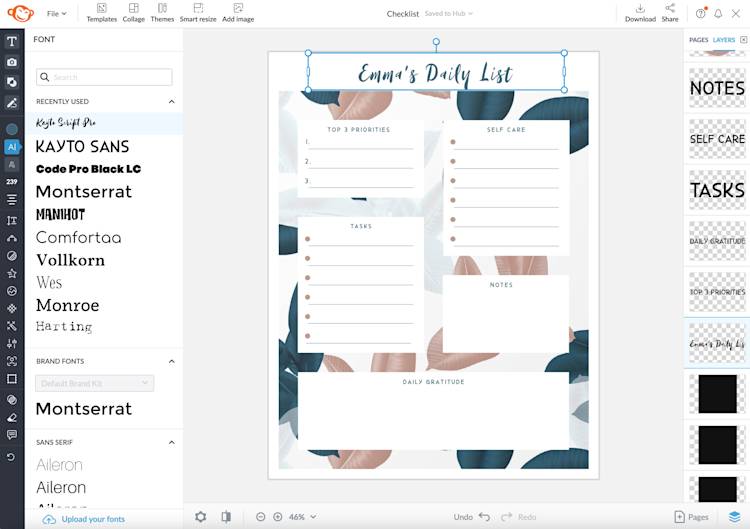
Finally, swap fonts by opening the Text tab. Select the text layer you want to change, then choose from a wide variety of fonts. Consider pairing fonts for total visual cohesion.
Edit the text itself to truly cater this checklist to your goals, such as adding your name to the top to make the design your own.
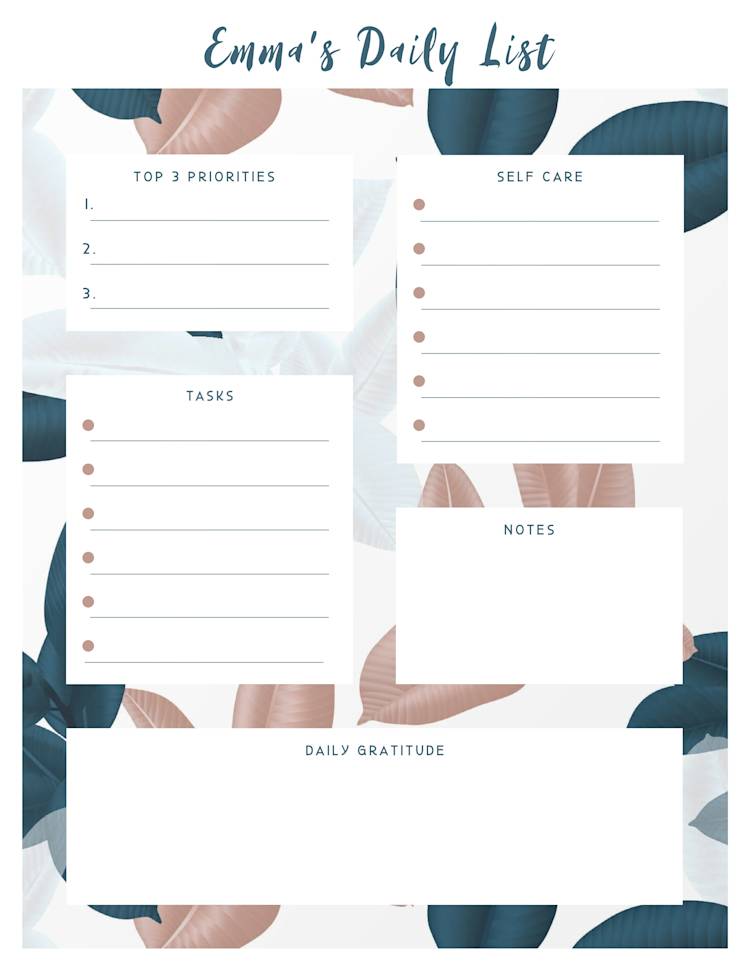
It’s time to give yourself some gratitude, because you now have a checklist that is ready to be used! Click Download in the top toolbar and export your list as a JPG/PNG (or a PDF if you're a PicMonkey Pro subscriber) then print it off!
To make the largest impact on your checklist, print on a sturdy sheet of paper, such as cardstock. You’ll really feel luxurious and oh so important when filling out that checklist and tackling those to-dos—it’s worth it in the name of productivity, we promise!
