Already love paint-on effects in the PicMonkey mobile app? Well, now you can get that same level of control when you apply paint-on adjustments to your photos. Adjustments are different than effects in that they allow you to tinker with the amount of light and colors in your image without needing to add a filter. Which means you can go all #nofilter on that photo after you adjust its saturation, and it’ll still be (technically) true! Don't have the app yet?


To learn all about painting adjustments onto your image, watch our video below. Or, skim the highlights to get the idea.
Paint on, paint off
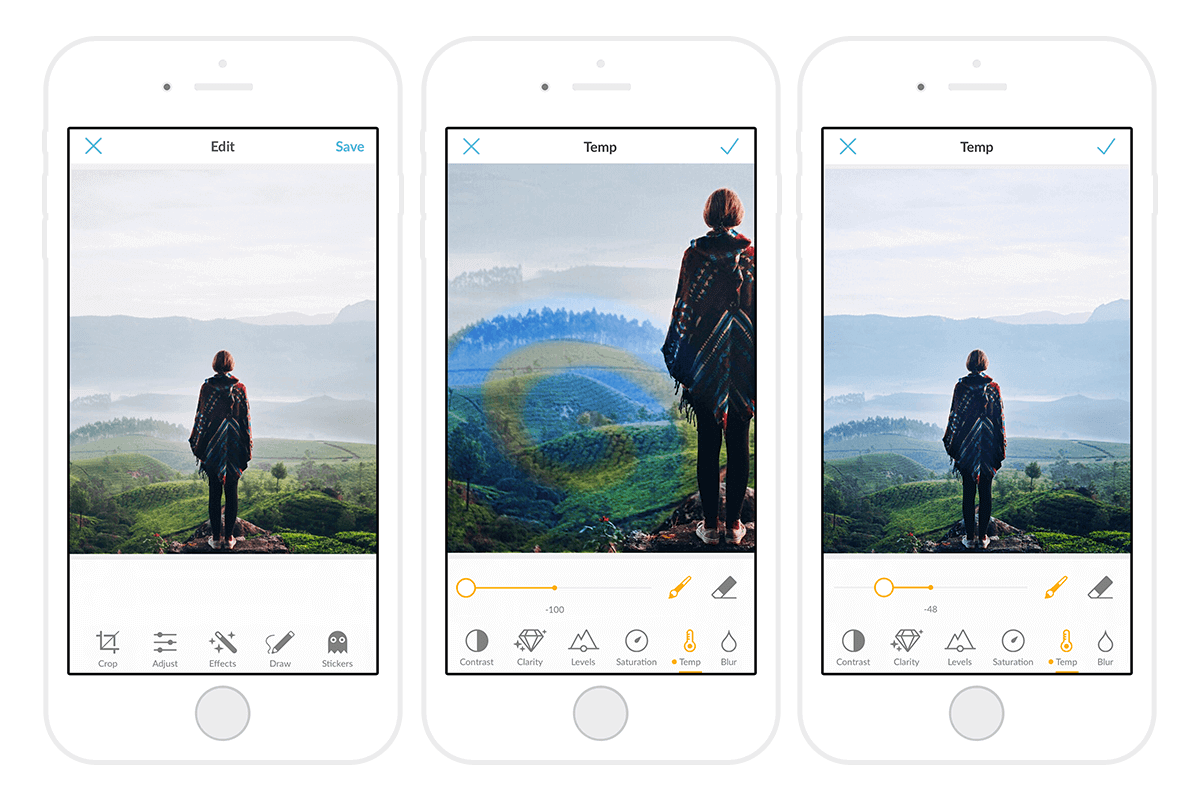
To get painting tap the Adjustments button, choose the adjustment you want to use, and adjust the slider to preview how it’s gonna look on your image. To paint it onto a specific part of the image, tap the paintbrush icon. Spread your fingers apart on the screen to zoom in and paint the adjustment on with your finger.
If you want to apply the adjustment to most of your image, but not all of your image, tap the eraser icon and paint the adjustment off with your finger.
And hey, all of you iPad people out there, don’t forget that you can use your Apple Pencil to paint your fav stuff on and off, too.
Layer ’em on
You can layer adjustments on top of each other without applying them right away. Use one, then tap the next. A dot will appear by the name of an adjustment you’ve used, so that you can keep track. When you’re finished, tap the checkmark in the top right corner of the screen to apply all of your adjustments.
Apply the same adjustment in different degrees
If you want to apply an adjustment to different parts of the same photo (and in different amounts) head back into Adjustments after you’ve applied your first round and reselect the adjustment you want to apply. Adjust the slider and paint it on like you normally would. Boom!
Pro tip: To compare how your pic looked before and after you applied adjustments, press on your image.
Tour the Adjustments
Wondering what kind of impact adjustments can have on your photo? Take a look at these examples to get a better idea of what each paintable adjustment does:
Brightness
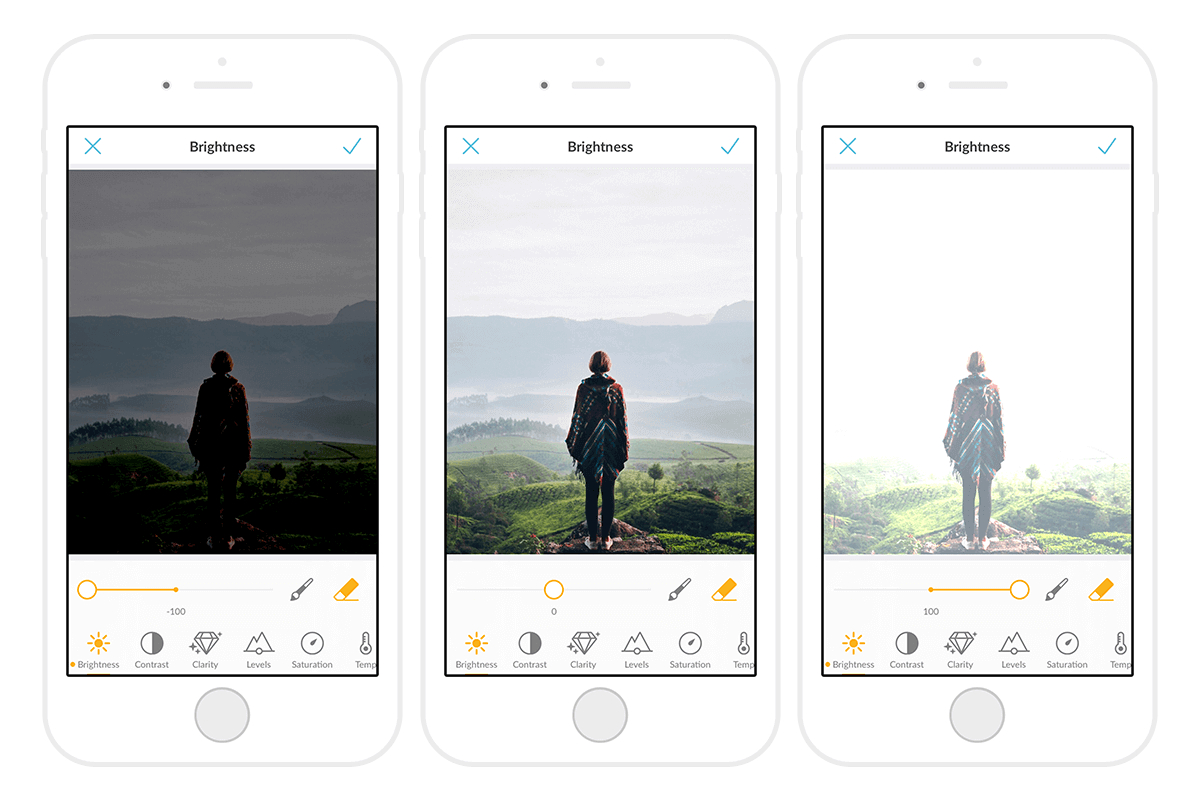
Brightness affects how light or dark your image is.
Contrast
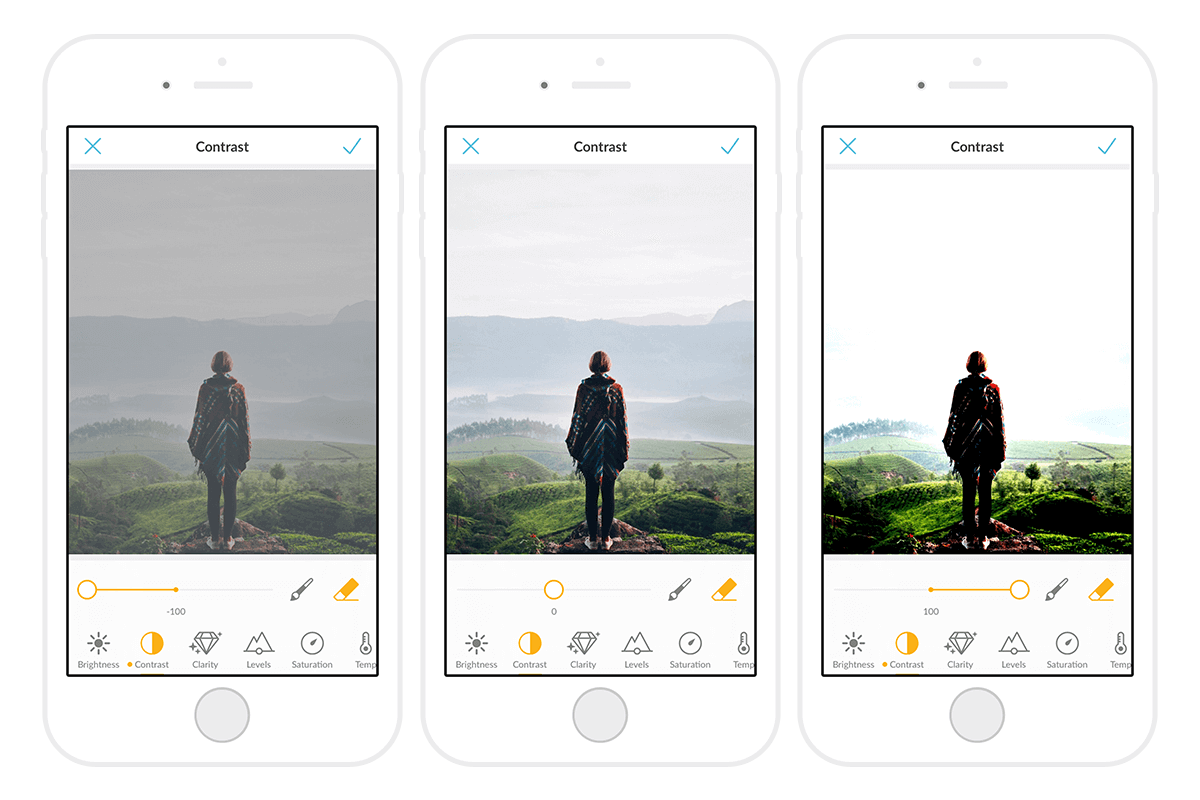
When you move Contrast to the right, it increases the difference between the lightest and darkest tones in your image, and when you move it to the left it minimizes the difference (giving the photo a gray cast).
Clarity
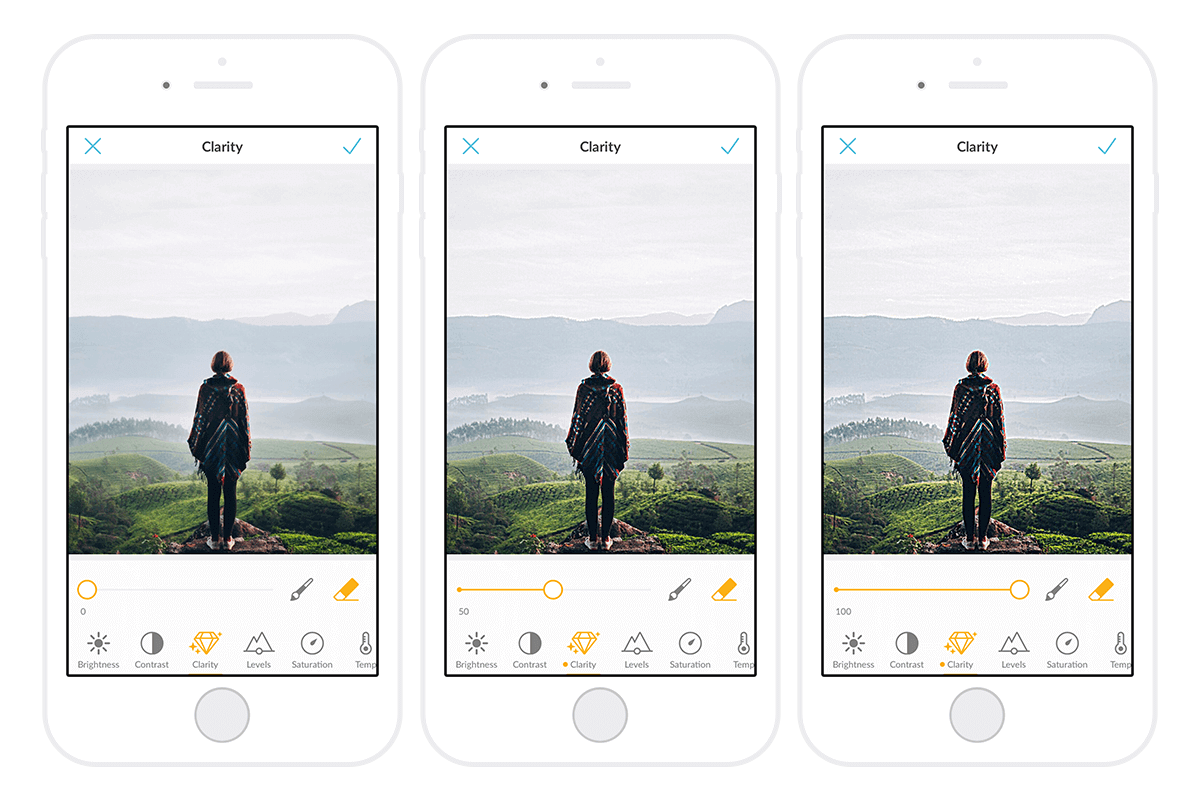
Clarity makes the details in your image look sharper and/or more granular. (If you move the slider all the way to the right, it starts to make the pic look a bit “crunchy.”)
Levels
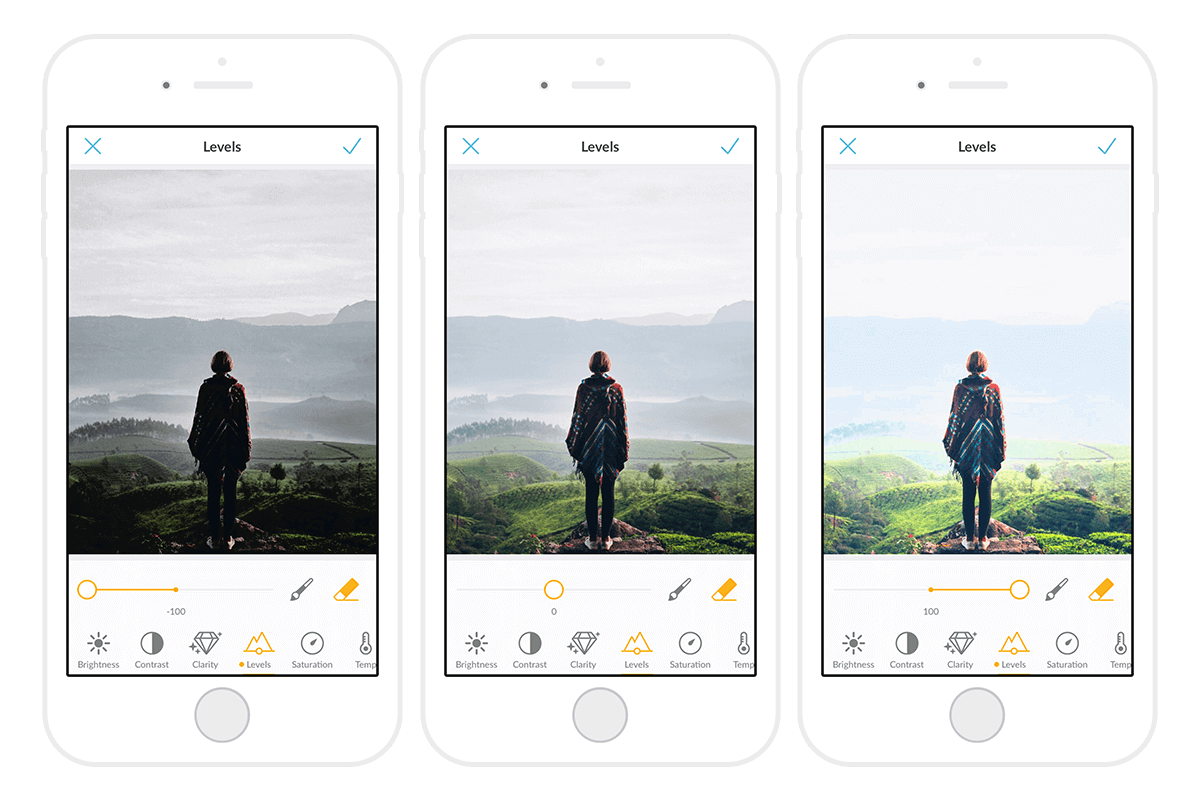
Levels works with the midtones in your image, either making them a darker gray or a lighter gray. This adjustment works well when fixing underexposed photos.
Saturation
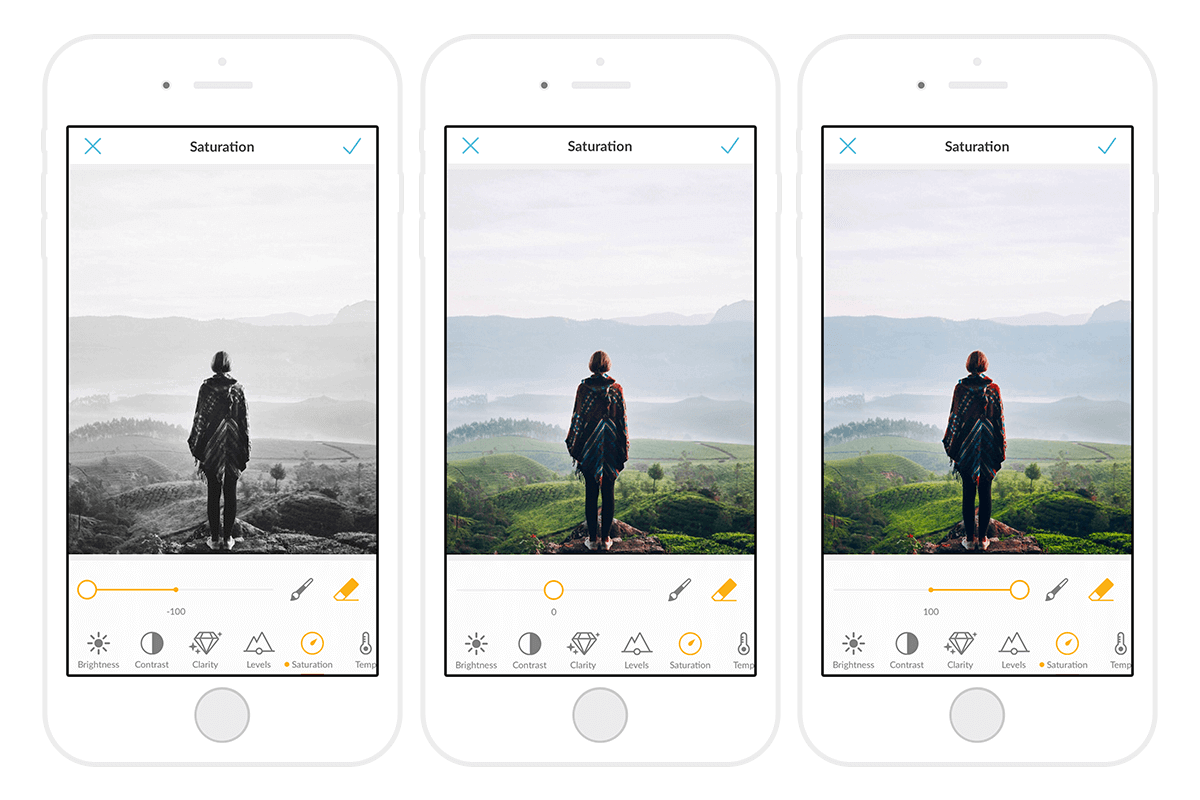
Saturation affects the colors in your photo. If you pull the slider to the left, you’ll make the colors more muted (all the way to the left makes the photo black and white) and if you pull the slider to the right, you’ll make the colors richer and brighter.
Temperature
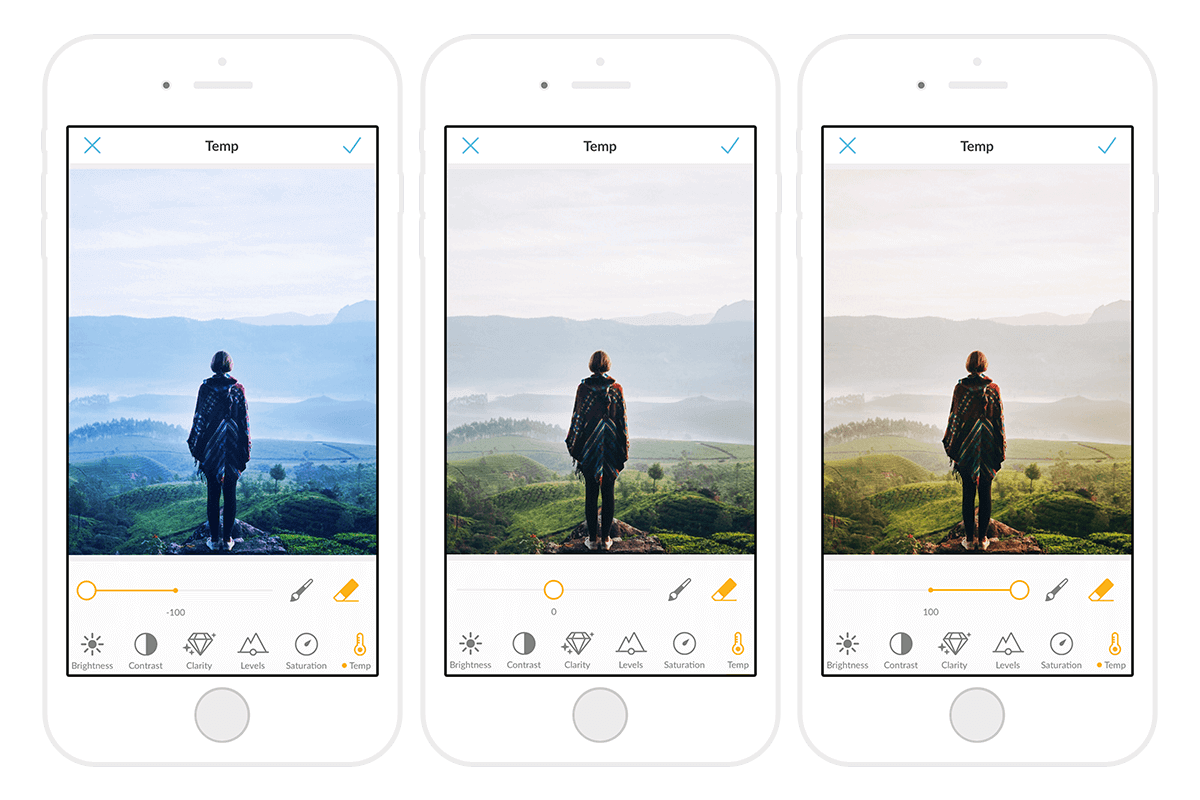
Temperature brings up either the blue tones in your image (if you pull the slider to the left) or the red tones in your image (if you pull the slider to the right).


