Our touch up tool is basically your digital caboodles box of makeup goodies, except we have every shade of lipstick that your mom refused to buy you when you were twelve. For your convenience and fun, we’ve put together a list of makeup tips that work just as well online as they do on your skin. (But you won’t develop a weird rash from forgetting to wash your brushes!!) Plug your #nomakeup selfie into the Editor and play along at home!
Even out your skin
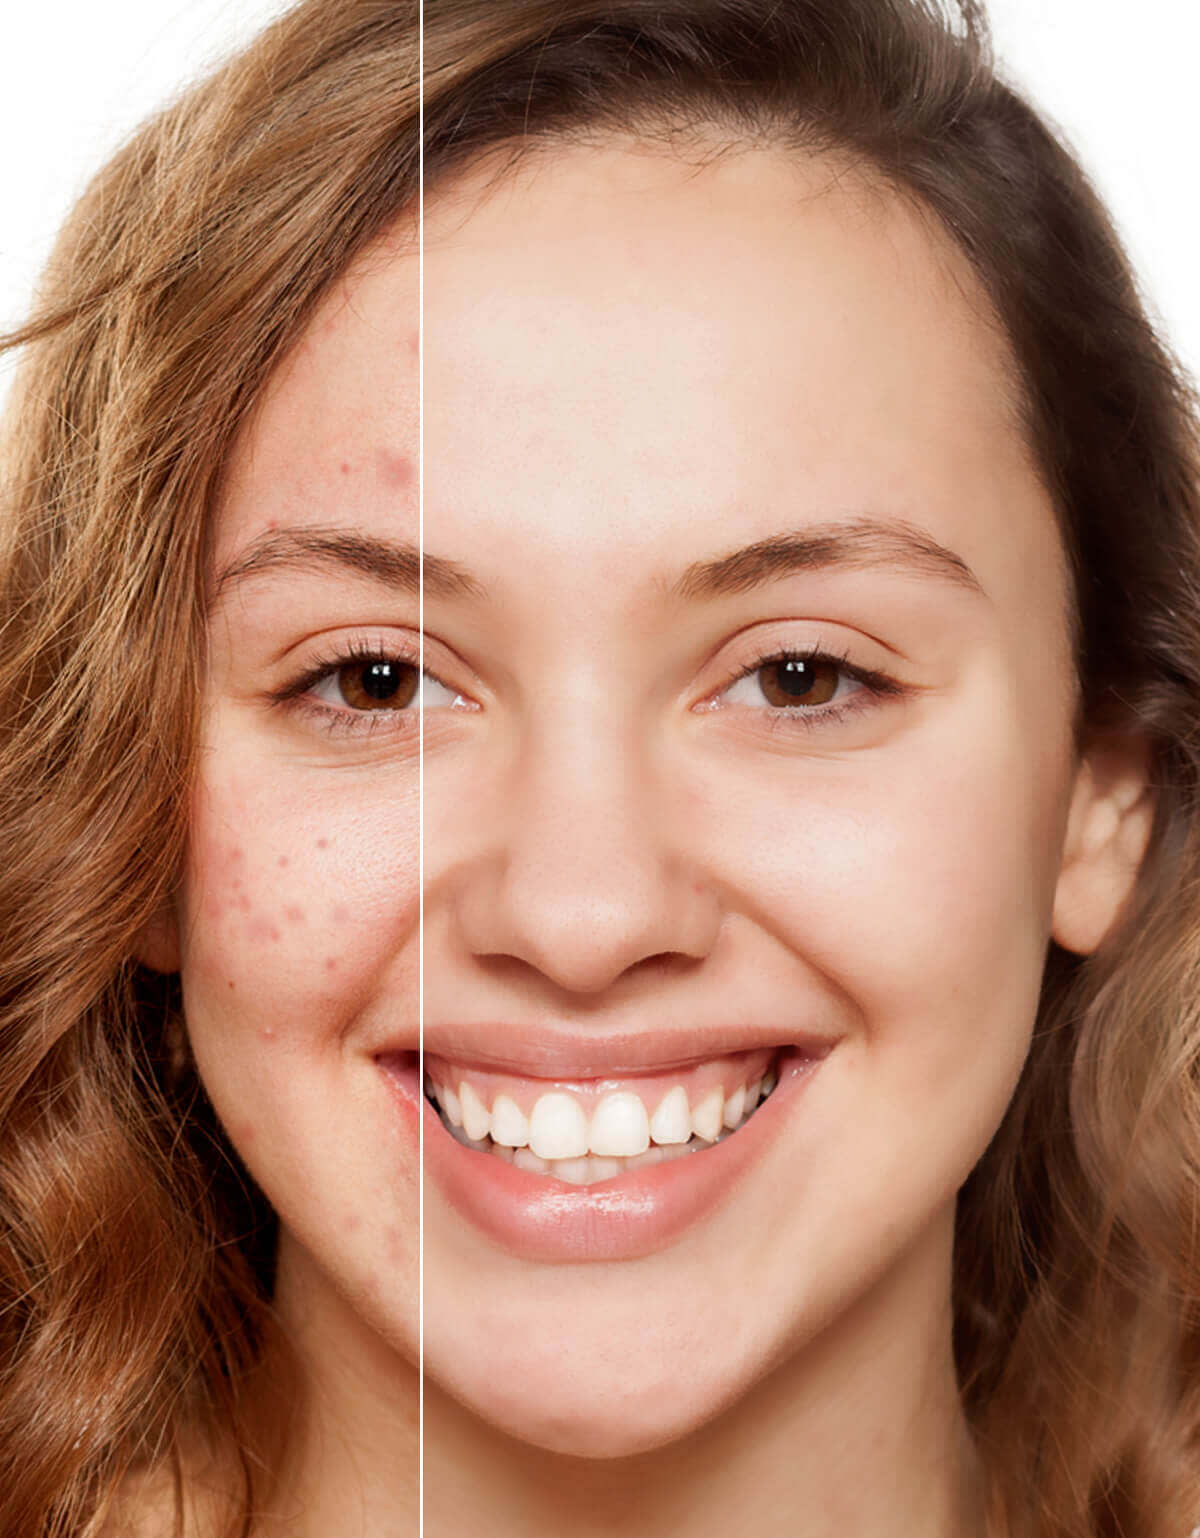
In PicMonkey, as in life, let’s start by evening out the skin before we get into anything else. This’ll give us a nice clean canvas to work with.
Use Blemish Fix to get rid of whiteheads and freckles. It’s a good idea to zap ’em one at a time, because if you make the brush too big, the skin will end up looking weirdly splotchy.
Use Airbrush to smooth away blackheads and any other blotchiness that Blemish Fix didn’t quite pick up.
Be sure to adjust the Fade slider so that the skin doesn’t end up looking waxy and alien. Stop adjusting when it looks good but still natural.
Underrated: Airbrush is also great for smoothing stray eyebrow hairs. Just sayin’.
While Wrinkle Remover works great to, you know, remove wrinkles, it also works nicely as an under the eye concealer and spot corrector.
Take shiny spots down a peg or two with the Shine Reduce tool. Adjust the size of your brush, click the shiny area and you’ll be back to matte in no time.
Shine reduce works best over smaller areas that look kind of oily.
Build your foundation
The neutral Blush Boost tool works great as foundation for a whole range of skin tones. Unlike regular foundation that you might need to patch test, you can start applying Blush Boost to your entire face and then toggle through different tones until you find the one that best matches your skin color. Some things to keep in mind:
Keep an eye on the color of your neck as you apply foundation, as the two colors should match.
Apply foundation to eyelids to reduce redness.
Unlike IRL, Blush Boost can spread outside of the confines of your face and hover amorphously on the empty space next to your head. If you accidentally veer outside the lines, just click the eraser icon to clean up the edges.
Adjust the Fade slider until the foundation matches your skin tone and/or looks natural.
Rosy it up with Blush Boost
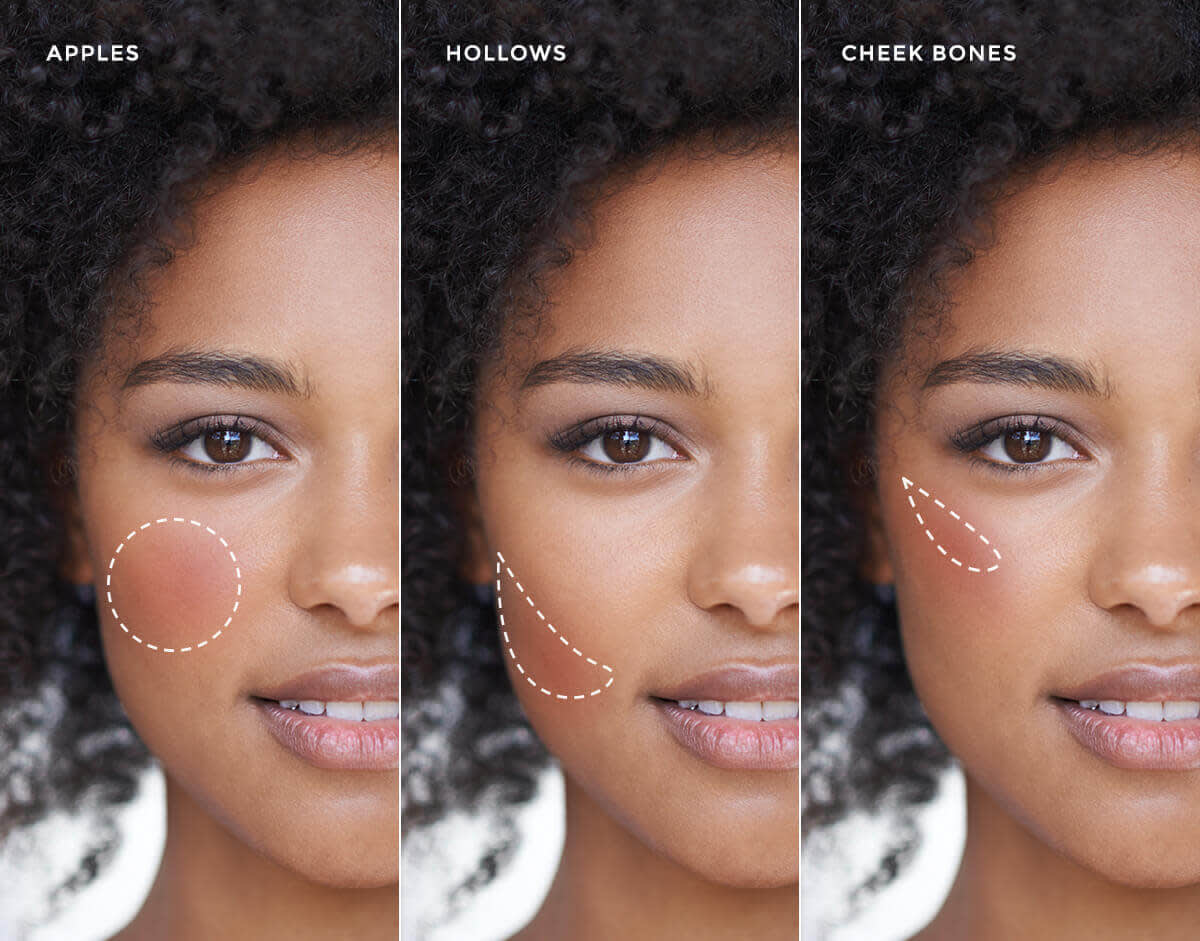
Before we get into blush, let’s take a tour around your cheeks: The apples of your cheeks are the parts of your face that pop up when you smile. Your cheek bones extended from the outer corner of your eyes to the outer corners of your mouth and you can apply blush both directly on top of your cheekbones and slightly underneath them in the hollows of your cheeks.
For all skin tones, pink blush should be applied in a circular motion to the apples of your cheeks. This will give you a nice, flushed look and make your skin pop.
Berry colors act the same way towards darker skin tones as pink blushes do to lighter skin tones. Apply them in a circular motion on the apples of your cheeks.
Darker skin tones can also use pink blush if the color is bright enough, but plum colors might be too overwhelming for lighter skin tones.
Peach blushes are good for sculpting and should be applied to your cheekbones in an up and down motion.
Beige blushes can be applied on the cheekbones and the apples of the cheeks to give them a filled out looks.
Again, you can test different colors by toggling through the palette after you’ve painted on one color and then adjust the Fade slider until it’s the right shade.
Flawlessly contour with Spray Tan
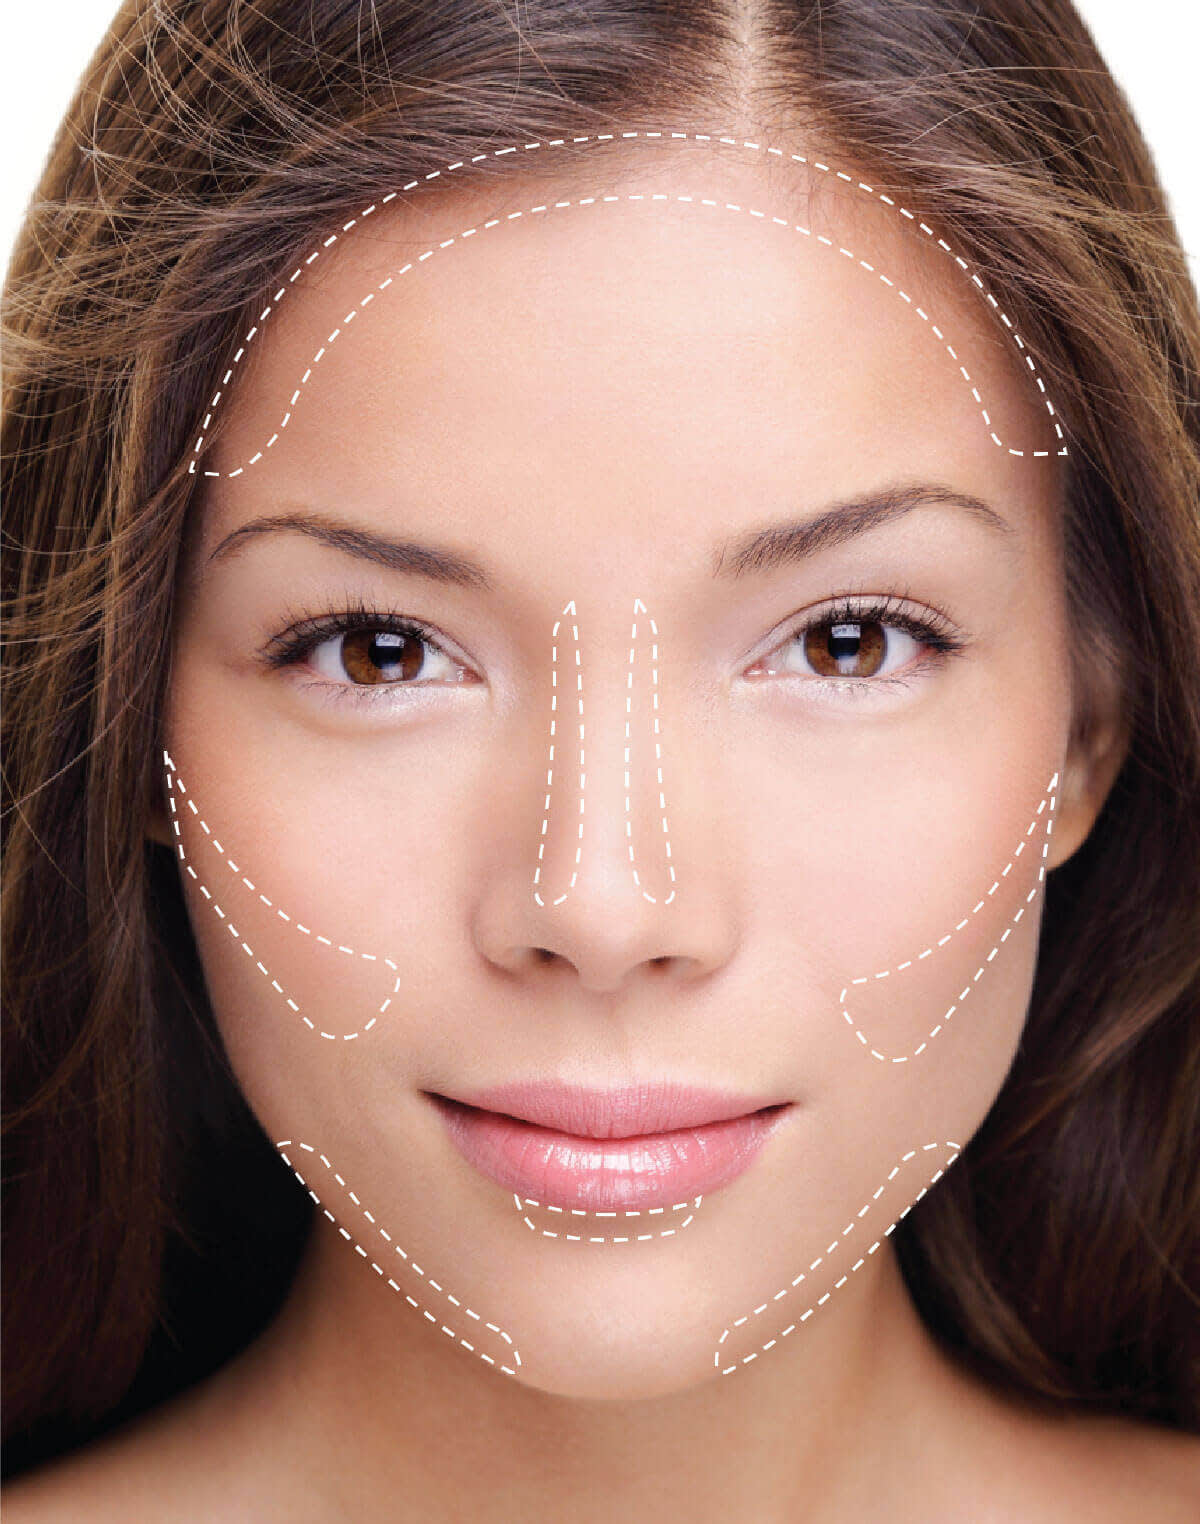
Applying bronzer is not only great for achieving a sun-kissed look, but it also helps give your face shape and definition.
You want to keep the bronzer color no more than two shades darker than your skin. Like with blush boost, you can apply Spray Tan with one color on your face and toggle through different shades in the palette before making your decision. You can also adjust the Intensity and Darken sliders to get a more personalized color.
For people with really fair skin tones, nude blush will work just as effectively as bronzer, and will appear more natural. Head back to the neutral palette in Blush Boost to try out those colors.
Sweep bronzer across your hairline and then brush it underneath your cheekbones (below where you applied the blush). Then sweep it down your jawline and underneath your bottom lip.
Turn the intensity slider waaayyyyy down until it looks natural.
For greater definition, apply Spray Tan in two thin strokes to either side of your nose and if it makes sense with the picture you’re editing, you can also apply it to your ears, neck, and cleavage.
Eyeliner 101
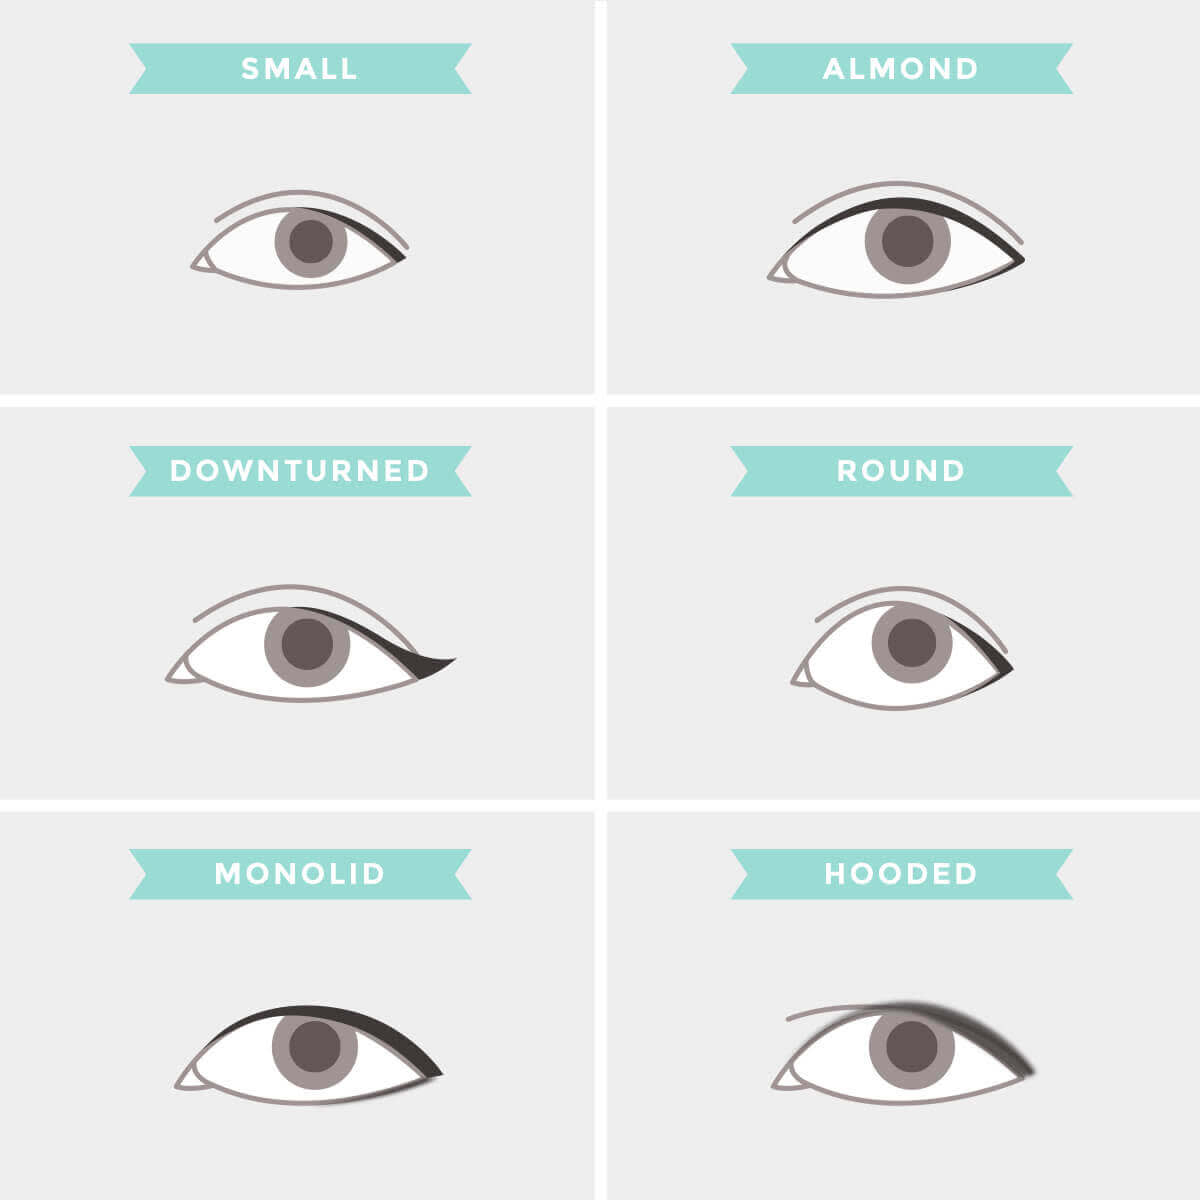
Applying eyeliner can be tricky, and a lot of that has to do with the fact that everyone’s eyes are shaped differently. What looks good on one person won’t necessarily look good on everyone, and some eyeliner looks are more appropriate for specific occasions. (Think: How you would do your makeup for work, vs. a night out.)
Here are a few guidelines, and ideas about the best looks for your eye shape:
If you have small eyes, lining your enter upper lid and lower lid is going to make your eyes look smaller. Instead, try lining your eyes from the outside corner, until you hit the widest point of your lid. (About midway across.)
If you only apply eyeliner to your bottom lid, your eyes will look upside down. If you’re trying to pick between one lid over the other, lining the top lid will make your eye look larger.
For almond eyes: Tightly line the upper and lower lash lines
For round eyes: Line the outer corners of upper and lower lash line.
For downturned eyes: Draw an upturned cat eye across the upper lash line.
For monolid eyes: Line upper lash line completely and experiment with lining the lower lash line with a thinner or smudged line.
For hooded eyes: Line your upper lash line and smudge.
To apply Eyeliner in PicMonkey, adjust your brush size and paint it on the parts of the lid where you want it.
Adjust the Strength slider to make the line thicker and darker or thinner and lighter.
Pick the perfect shade of lipstick
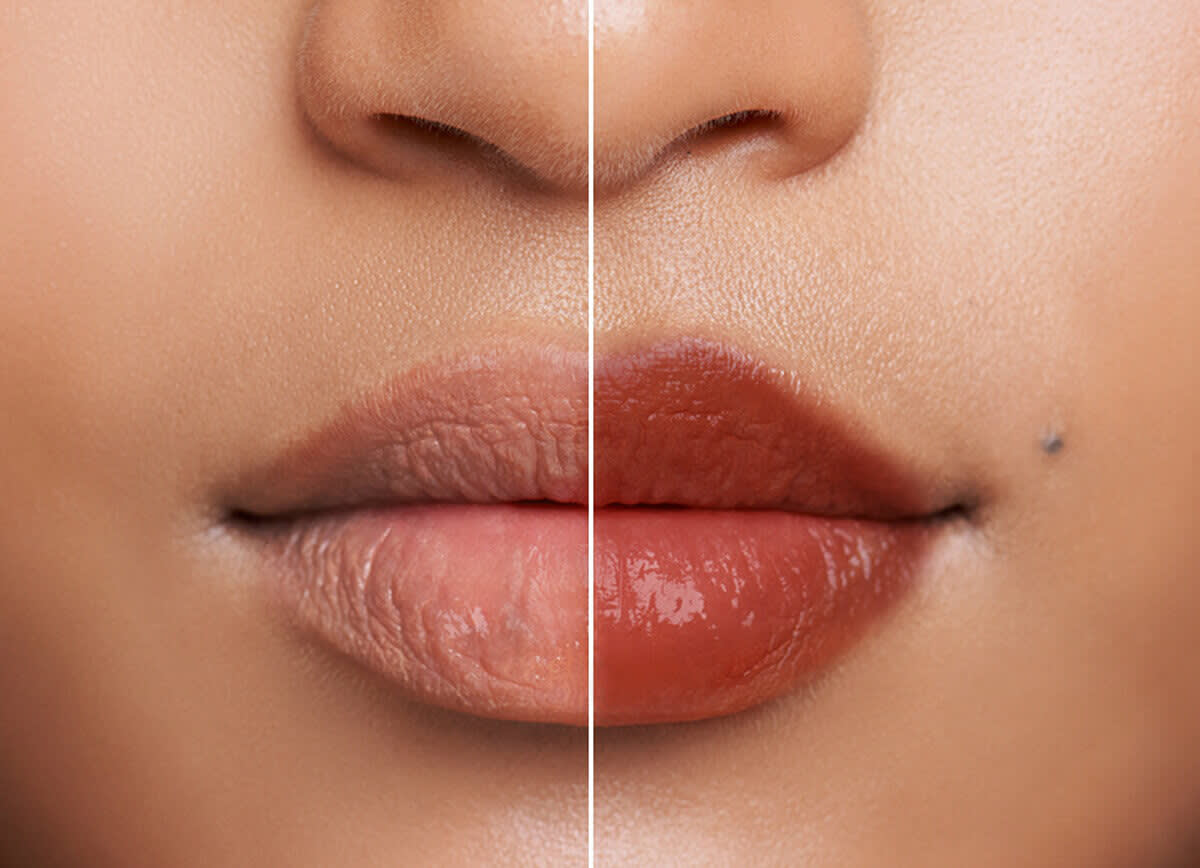
Contrary to popular belief, you should pick lipstick shades based on the natural color of your lips and not the color of your skin.
Here are some good rules of thumb:
Pale lips look best with cherry red or coral lipstick.
For lips that are naturally rosy, try cranberry, hot pink, or orange.
Try brick red or burgundy for dark lips.
Good nude lips are slightly deeper or brighter than your skin tone.
If you’re on the pale side, look for a nude color with some hints of pink so that you don’t look washed out.
For more control, start applying Lip Tint in from the center of your lips.
Similar to the other touch up effects, you can apply Lip Tint and toggle around to different colors in all three lip palettes.
To personalize the colors in each palette, adjust the Hardness, Intensity, and Tone sliders.
Lip Tint can be tricky to apply, so don’t be afraid to apply it all in big, messy strokes and then erase to refine it down to the right area.
Build the drama with Mascara
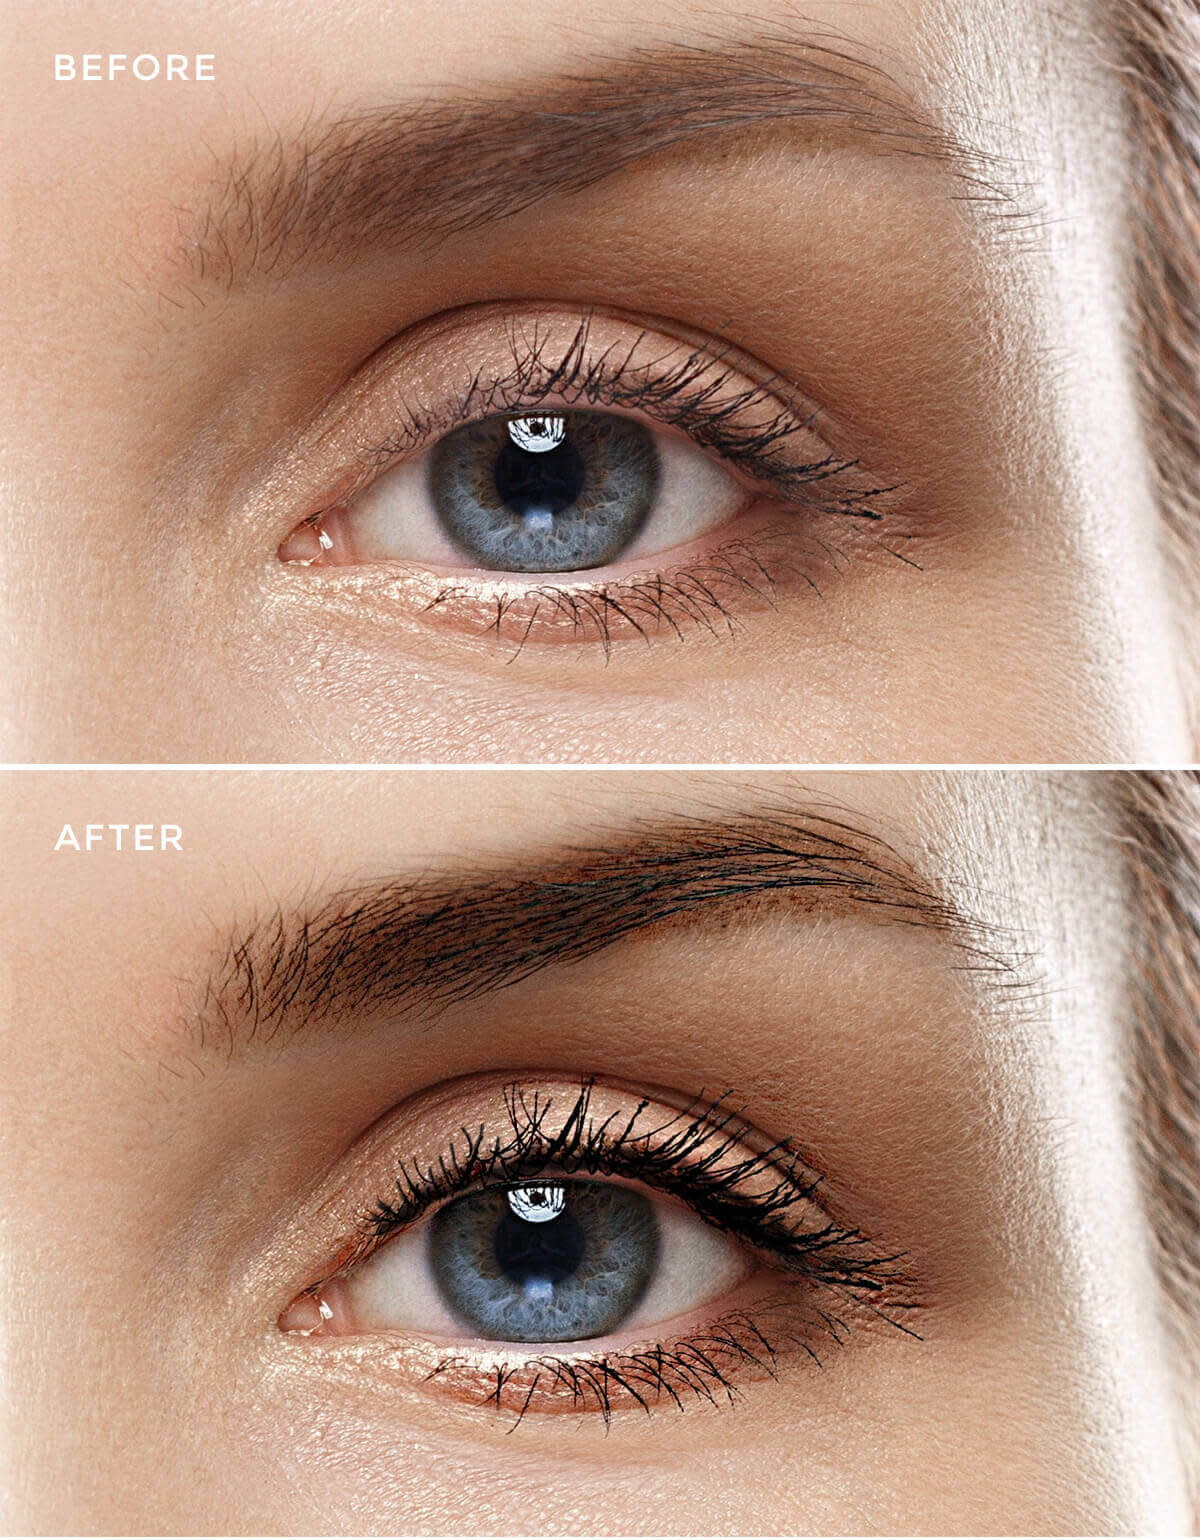
Mascara is an intelligent tool that finds your eyelashes and darks them – without smearing color anywhere else.
To apply Mascara, adjust your brush size and paint it over your upper and lower lashes. (Applying it to both makes you look more awake. Plus, there’s no fear of smudging.)
Adjust the Fade slider until it looks right to you.
Pro tip: Apply mascara do your eyebrows to slightly darken them and give them a fuller appearance.
Get those brows on fleek with Eyebrow Pencil
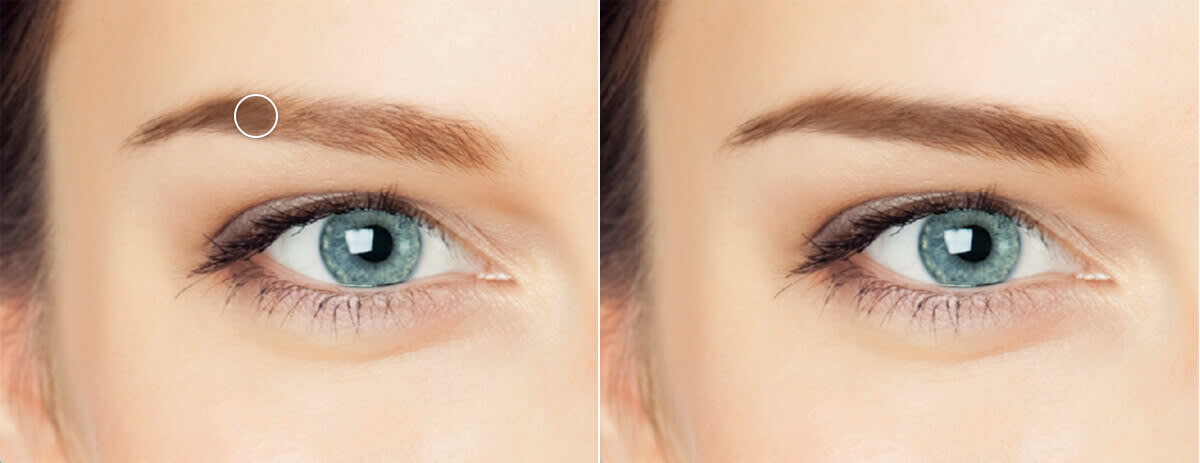
With Eyebrow Pencil, you want to choose a color that best matches the color of your eyebrows in the picture.
Make brows look even and fill in empty spaces.
Play around with the different shades until you find one that matches best.
If you go too far out of the lines, use the eraser tool to clean up the edges.
Adjust the Fade slider so that it looks natural and not like someone took a highlighter to your face.
Finish off the look with some Eye Shadow
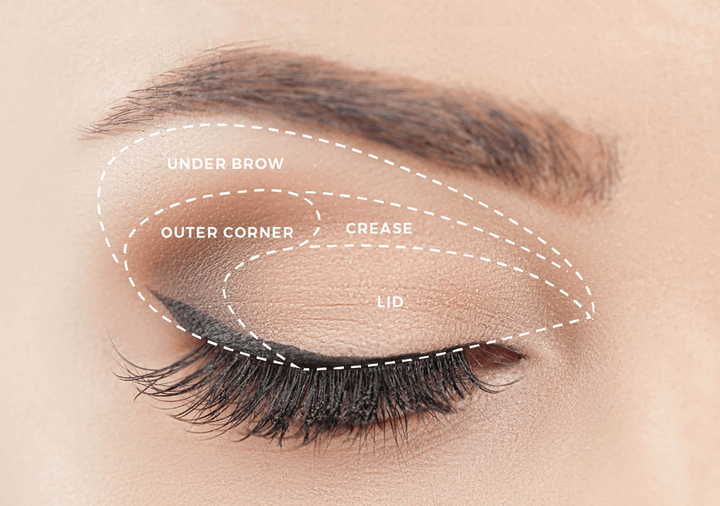
Eye shadow is a step that can often be overlooked since it’s usually best for nighttime. When applying eyeshadow, here are the main things to keep in mind:
The lightest color you choose works well as a brow bone highlighter and will also look good right under your tear ducts.
The second lightest color looks good on the lid (the part directly behind your upper lash line).
The second to darkest color looks good on your crease (this part is behind your lid and is still visible when your eye is all the way open).
The darkest color looks best on the outer corner of your eye.
When applying eye shadow in PicMonkey, click Apply to add one color at a time.
Because you’re working with a 2D picture instead of a 3D face, you might not be able to fully access all the parts of the eyelid. That’s okay – you can apply this effect as much or as little as you want on the parts of the eye that are visible.
